[center]By Michael Gardner (Beachbum)[/center]
Introduction
There’s nothing like striding up to your own tap and pouring a pint of your best. However kegging can be very confusing for the beginner as there are so many possible setups, from the simple private setup in the brew shed which could just be a small fridge, one keg and a plastic tap to the fully fledged bar with a row of frozen fonts that could take pride of place in any pub.
This is a basic introduction and is not intended to replace the sound advice you will be able to get from a good supplier, but will acquaint you with the background to the subject.
Here are three common setups. Then we’ll discuss how you get there.
Commercially supplied “kegerator”.

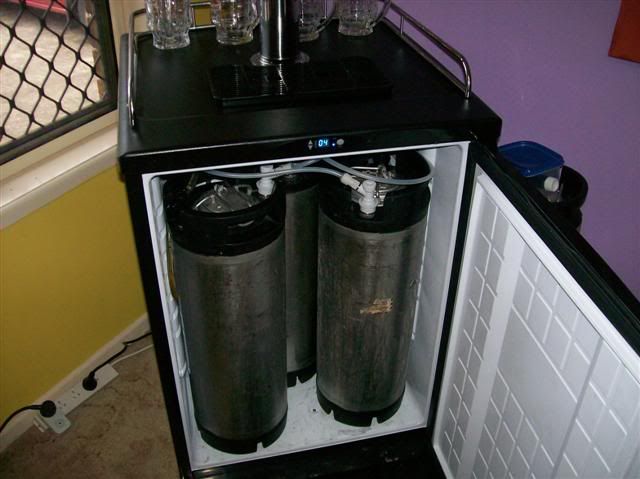
Modified Fridge.
Although brand new fridges are comparatively cheap nowadays they tend to be tall and thin in the cheaper ranges and to buy one that can hold two or three kegs, then adapt the unit, it usually works out around the same or even more expensive than buying an off-the-shelf kegerator. There is of course the danger of buying someone else’s problems when you get a second hand fridge. But if you can get a reliable one then this can be the least expensive way to go.
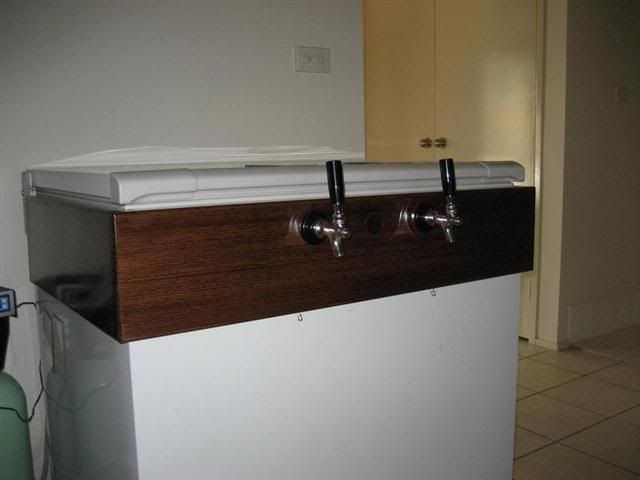
Modified Chest Freezer.
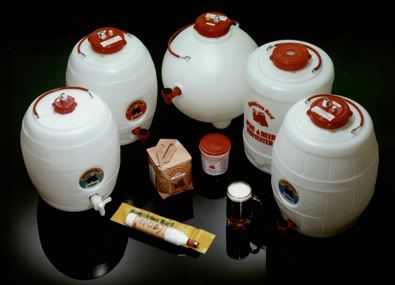
Pressure barrels have long been very popular with home brewers in the United Kingdom.
In other parts of the World (and increasingly in the UK itself) another type of keg has become very popular in recent years:
The Cornelius Keg (“Corny” or “Cornie”)
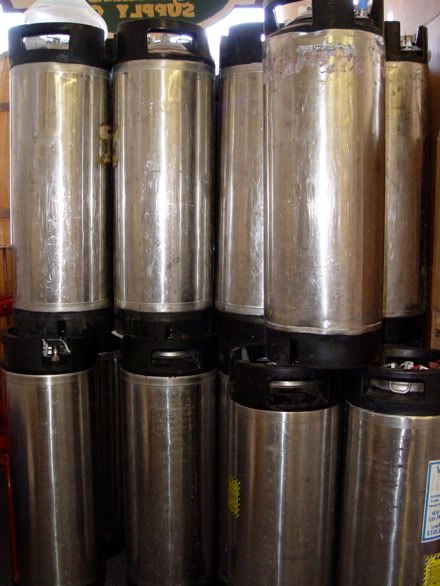
http://en.wikipedia.org/wiki/Cornelius_kegs
As soft drink dispensing has gone to bag-in-a-box, vast numbers of good used Cornies are available in the trade. The majority are ball-lock and only these will be discussed here.
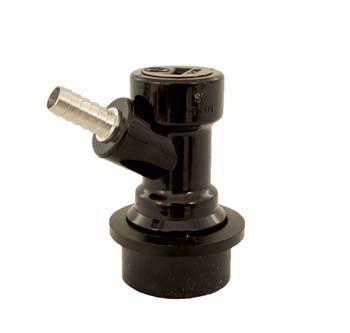
The keg has two outlets or ‘posts’ – Gas In and Beer Out. They may have slightly different shapes as in the following photo, or “In” and “Out” will be moulded into the black casing next to the post.
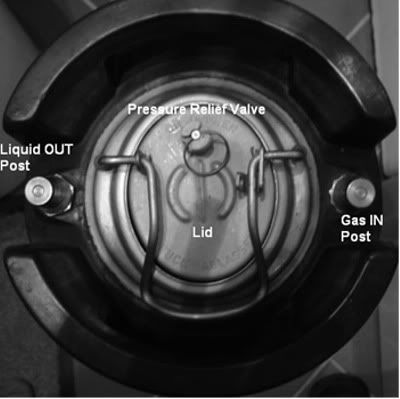
To remove the lid the spring lever assembly is levered up to release the lid downwards, then the loose lid is manoevred out of the keg. When reassembling, the lid is manoevered back into the keg, held in place and the spring lever assembly pushed down to raise the lid up hard onto the O ring, sealing the keg again.
Gas Supply.
Now you have your gas in QD with a gas line attached, you need to connect it to a gas supply.
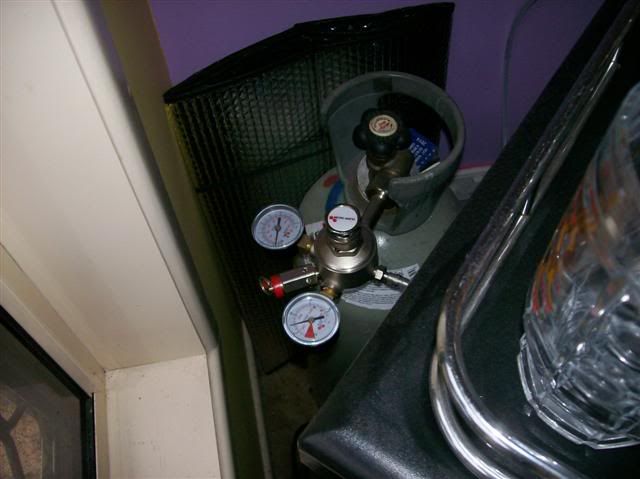
The bugbear of kegging is the gas supply. Although CO2 is not expensive, per brew, a gas cylinder is expensive to buy or rent. I rent one through an industrial gas company for around $AUD 3 per week. However once the cylinder has been set up, it is low maintenance and can usually be forgotten about until it needs refilling. One thing you have to have is a ‘regulator’ or “Reg”. The pressure of CO2 in the cylinder is way too high for serving and the pressure needs to be stepped down to serving pressure. Here’s my regulator, a middle – of the range unit.
The advantage of dealing with an industrial gas supplier is that there is one in every area as they mainly exist to service mechanics, welders etc in the district. However they often will only refill their own brand of bottle so be careful if you decide to adopt an alternative type of supply.
Alternatives:
Some home brew shops offer to sell you an “own brand” bottle which can be exchanged for a full one. This is fine but if you are not near a home brew shop, or if the shop goes out of business and you need to travel to an alternative shop, this can be a hassle. Most industrial dealers will not fill these bottles.
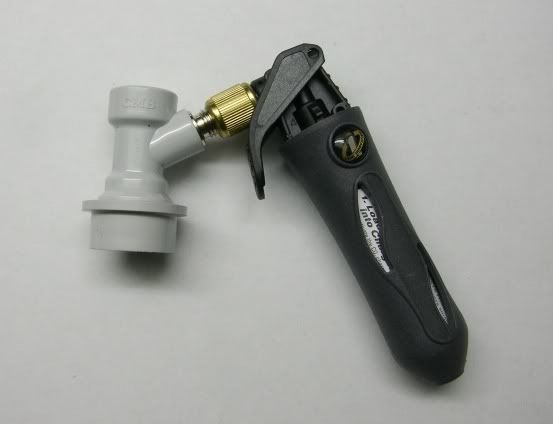
You can easily buy keg “chargers” which take bulbs or small cylinders such as “Sodastream”. Convenient but far more expensive for gas in the long run. I actually have a keg charger for occasional use if I take a keg to a party or a brew-day.
For the purposes of this article I’ll assume a ‘normal’ CO2 industrial cylinder and a regulator.
Taps and Fonts
Your other QD (the black one) now needs to be connected to a tap for serving. Here are the alternatives.
Party taps
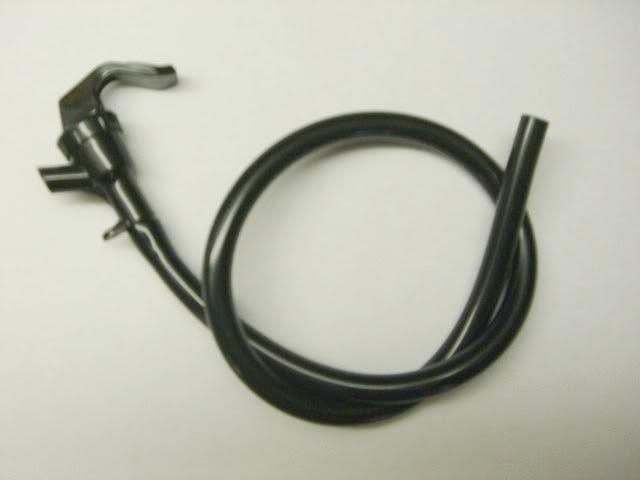
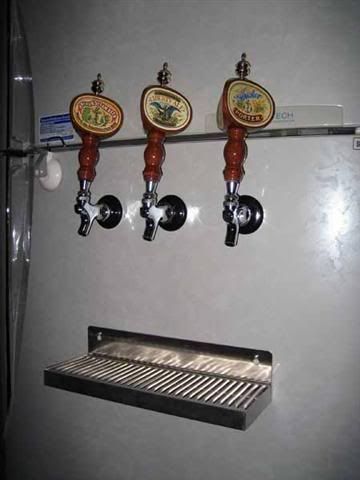
“Horizontal” Taps
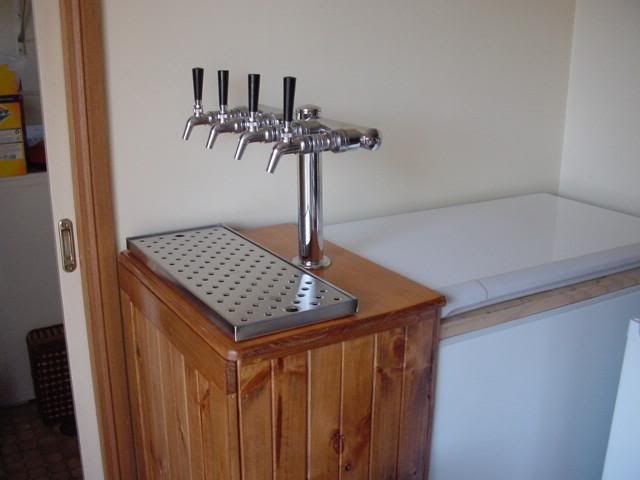
Upright Fonts
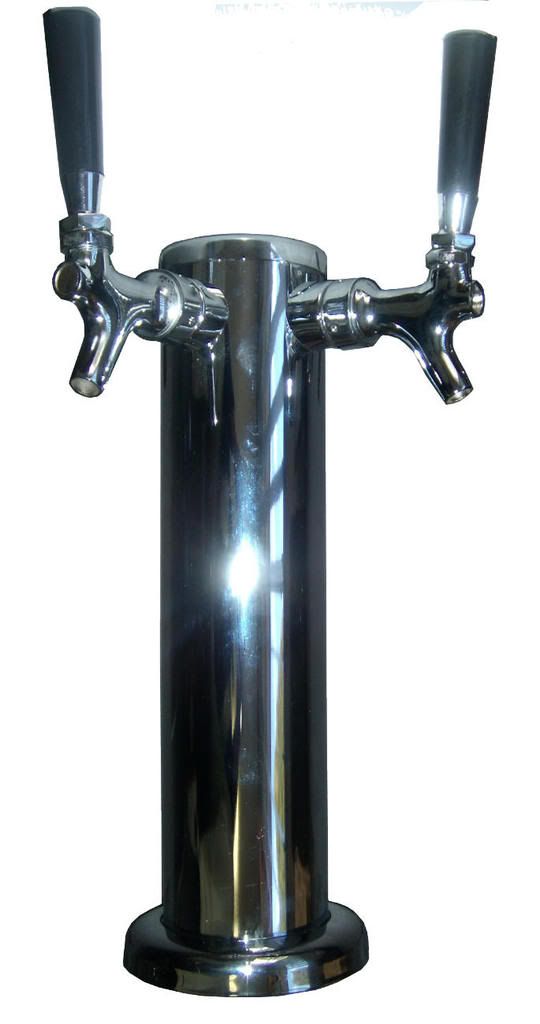
One disadvantage of a font is that despite its eye candy appeal, in between pours, because the font itself is at room temperature, there is enough warm beer left sitting in the line that the first glass is not as cold as the interior of the fridge. An advanced work-around is to install a computer fan at the base of the font to constantly blow cold air up into the font body. Not covered here.
However some brewers are so obsessed with obtaining the zero temperature glass of lager that they obtain so called “flooded fonts” of the sort you see in pubs.
Putting it all together.
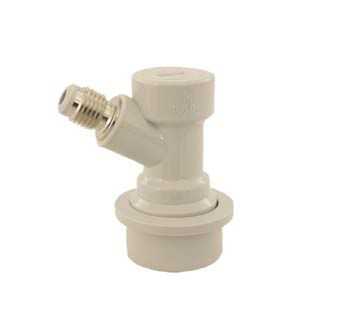
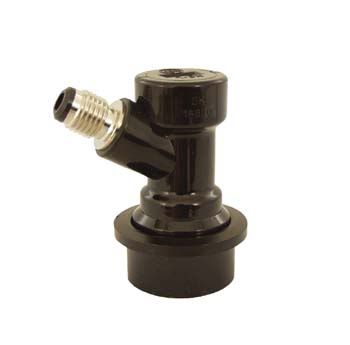
So you have bought a fridge of some sort, obtained some taps or a font, got your gas and a Reg and now need to put it all together. First off, look at these two Beer-Out QDs . Yes the black ones.
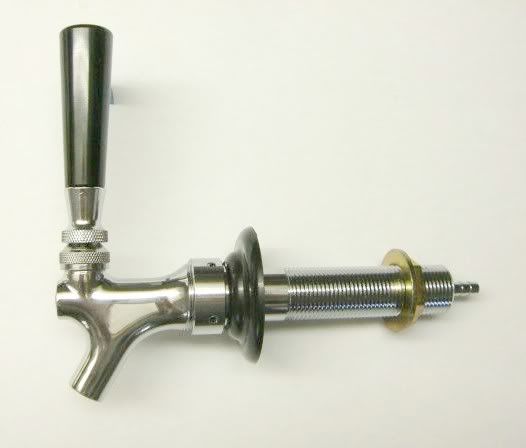
The other one has a threaded outlet that obviously is crying out for something to be screwed into it. So what is that thing? Here’s a picture of one of my Beer-Out QDs.
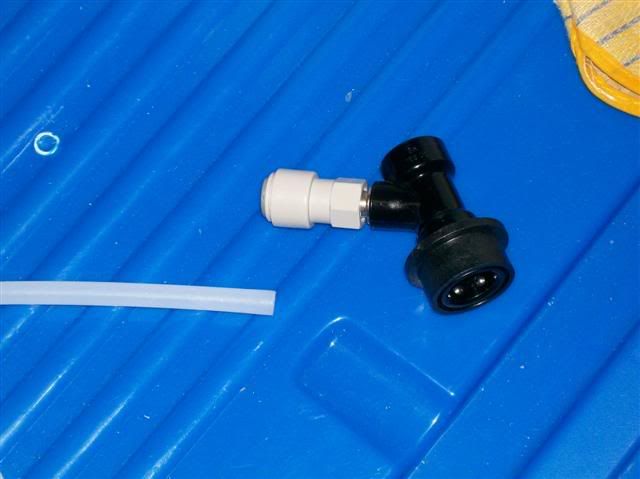
A QD on top of a QD? What’s the point?
Well you can connect your whole system together using barbs, and you will get a rock solid system that will hang together. However a barbed system is set in stone, but it is often handy to be able to disconnect lines, take the system apart and plug it back together again, extend it etc. For a few extra dollars I would encourage you to look into these fittings (Sold internationally as John Guest Fittings).
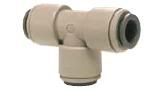
Here’s another handy John Guest (JG) fitting:

How easy is that, just push the lines in and the JG fitting grasps all the lines instantly.
Like any good Lego set there are a number of JG fittings that enable you to connect two, three or more kegs to your gas line.
Ok here’s a gas–to-tap guide to getting it connected. You will need:
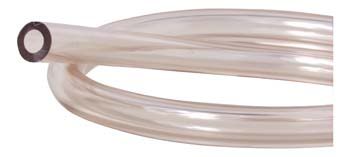
(BTW stick to the same diameter line throughout for gas and beer and it will simplify things.)
Once the line is inside the fridge you need to distribute the gas line to the kegs. For two kegs use the splitter shown above. For three kegs use a JG Equal T off one of the sub-lines,
You will then need, for each keg, a Gas-In QD , either a barb type or the threaded type that takes a JG female adaptor (recommended). Ok the gas is now in the keg.
To get the beer out to the tap you will need a Beer-Out QD of barb type or the threaded type that takes a JG female adaptor (recommended), and some line to the tap. Now when you get to the tap itself you may have a choice of barb or JG depending on the brand. The horizontal tap in the previous photo happens to be barbed as you can see. Again if you can get taps that take JG fittings it makes it more flexible, you may want to take a tap out of service for repairs and redirect the beer line to another tap. However this is a ‘beginners’ and if you delve deeper there’s a frightening array of parts and bits out there as you would expect in a beer industry that services billions of drinkers around the World.
Ok take a break and have a beer, you now have all the parts to connect up. But you now need to balance the system so you are not pouring a dribble of flat beer or a mass of foam.
Balancing your keg system
Total lack of knowledge of subject, need assistance here
Cleaning and Servicing.
You won’t be changing kegs and cleaning lines as often as in a pub, one would assume. Personally I only clean my lines every three or four keg changes because I usually have a keg to go, plug the new keg in immediately and use the first rush of the new beer to flush out the line. I have a friend with a one-keg system who cleans his lines once a year whether they need it or not. And has never had a problem.
However if you are a regular cleaner, a good idea is to put some cleaning fluid (a solution of Saniclean or alternatively Starsan – available internationally) into an empty keg , connect up to the gas and pour a jug or two of cleaner out of the system. There are several commercial line cleaners available that you can source through your local catering suppliers.
Servicing of the taps is essential. Even towards the end of a keg they can become sticky and can even jam when trying to pull, from gums and residues that build up, and it is a good idea to carefully dismantle and clean and lubricate them regularly. Look at this photo again.
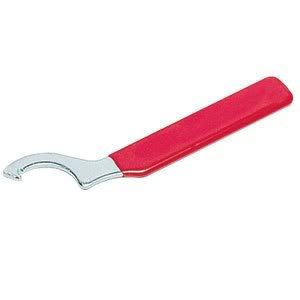
Once the tap is off, you can easily unscrew bits and take it down to its components, wash them all up and reassemble. There will be a cylindrical slider that goes backwards and forwards in a ‘barrel’ and this needs to be lubricated with a smear of keg lubricant. This special lubricant won’t affect beer foaming.
To clean the Kegs themselves, my method is to store an empty keg ‘dirty’ but still pressurized until needed. If the beer was good then the keg can sit for weeks. Then release the pressure by burping it, take off the lid and then treat it as a huge home brew bottle. Wash it out with warm water three times with vigorous shaking. I use a solution of Sodium Percarbonate (found in diaper cleaners such as Napisan), rinse that well, then use a no rinse sanitiser like Starsan, and then fill with beer.
To clean the dip tube or ‘spear’ you can remove it by unscrewing the Beer-Out Post, but normally I just pour a kettle of boiling water into the keg, seal quickly and shake, then carefully depress the button in the middle of the Beer-Out post with a screwdriver and get a fountain of boiling hot water that scours out the post (wear gloves and a hat).
In closing, this has been an introduction only, you won’t pick up all the skills till you are actually kegging. So your best guide is to talk to the store you are buying your gear from and I am sure they will help you to configure your system and put together a list of all the parts you need to purchase. It will also help if you can get to an existing kegger and have a look at their system.
Happy Kegging :twisted:
Beachbum

