Using a Tap King for your BIAB batches.

Post #1 made 10 years ago
Many of you may have already read up on this/know about it, but in the interests of sharing info, I'll post it up for those who may not have considered this or read about it.

Many of you already probably have keg setups, so won't be so much interested in this, however I've got a slight issue here. See, SWMBO is concerned about energy consumption, and it has become apparent that it's not within our budget with regards to energy consumption to have another fridge dedicated to kegging, and the beer fridge I already have I have to share with her.

Dilemma here is i'm sick and tired of bottling, and I quite like the idea of being able to pour myself a schooner from the fridge. So then I stumbled across a potential solution to this problem (all credit for this goes to driftdaddy over at AHB, he pioneered this one). This is a way of more than halving my bottling, and giving me some of the benefits of kegging/draught beer.

So, what is a TapKing you may ask?
The Tap King is an ingenius little device developed by Lion Nathan, which allows you to drink draught beer at home straight from the fridge. It is aimed at the average aussie megaswill drinker, wanting to have their favorite beer on tap in their fridge at home. The unit can however, be easily adapted for refilling with home brew. Official website can be found here: http://www.tapking.com

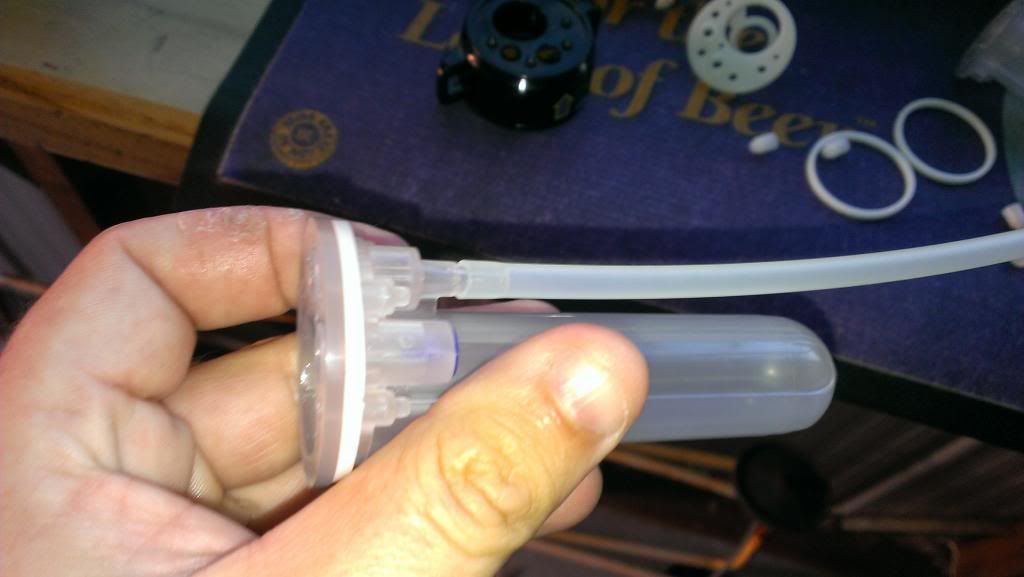
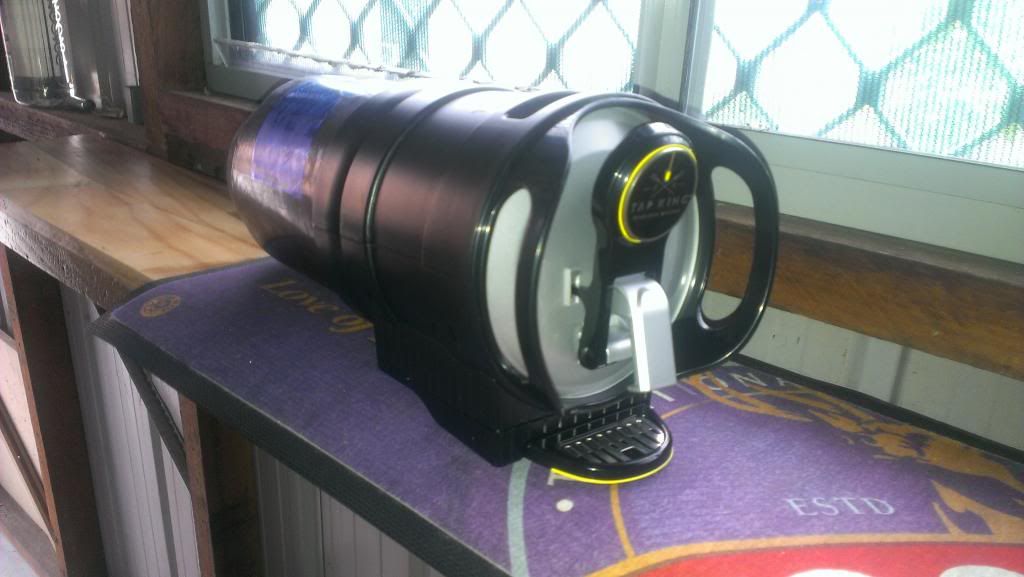
Here is the TapKing unit:
Image
So how does this thing work?

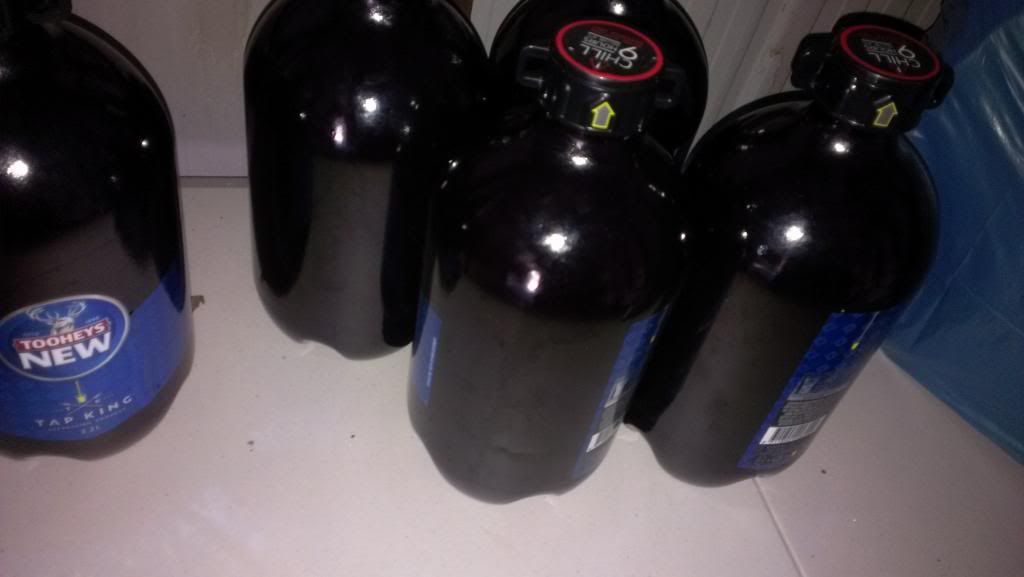
The TapKing unit is quite simple, and consists of 2 main parts, a 3.2L PET bottle filled with your choice of brew, and the unit itself, which some refer to as the head unit.

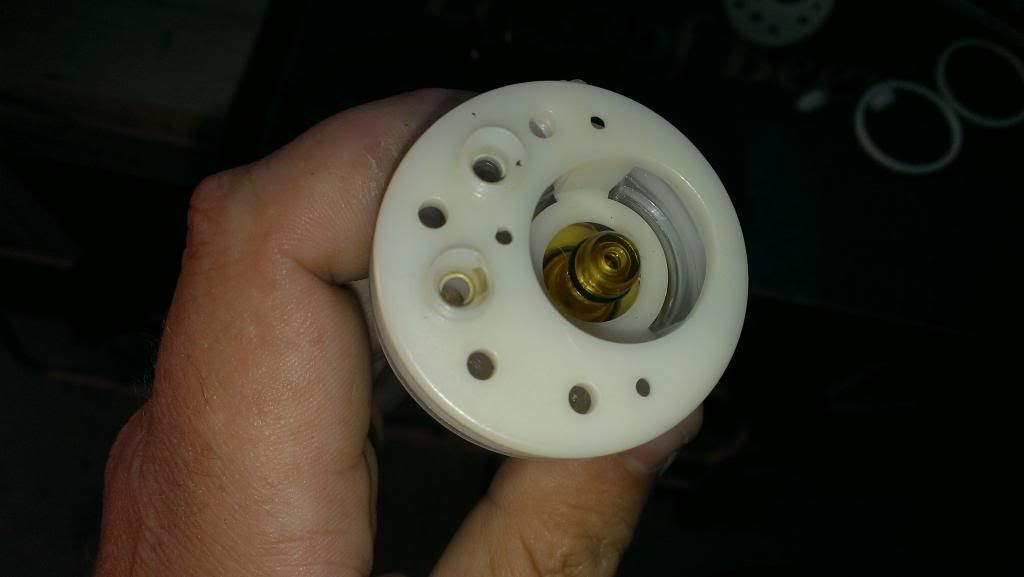
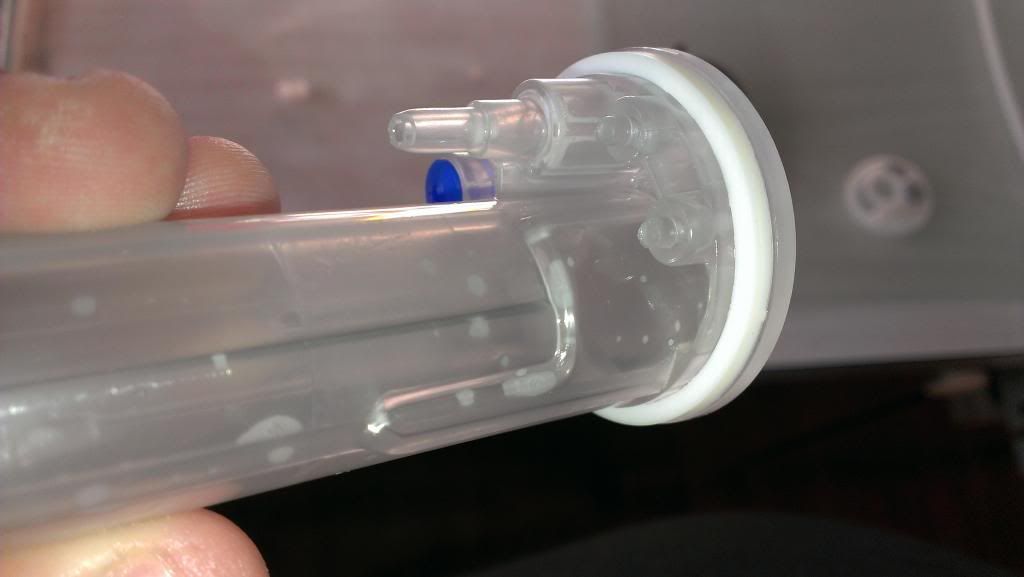
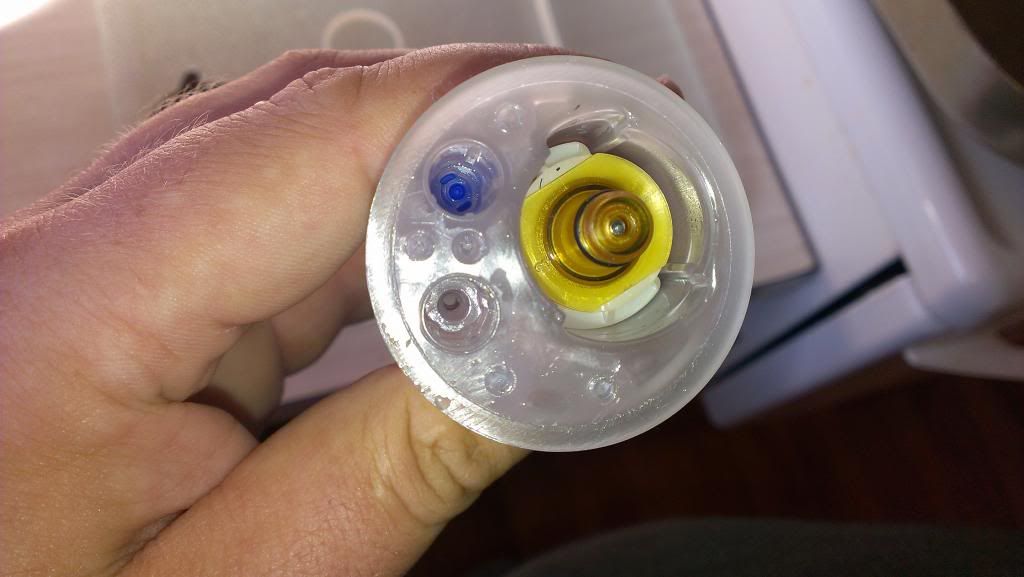
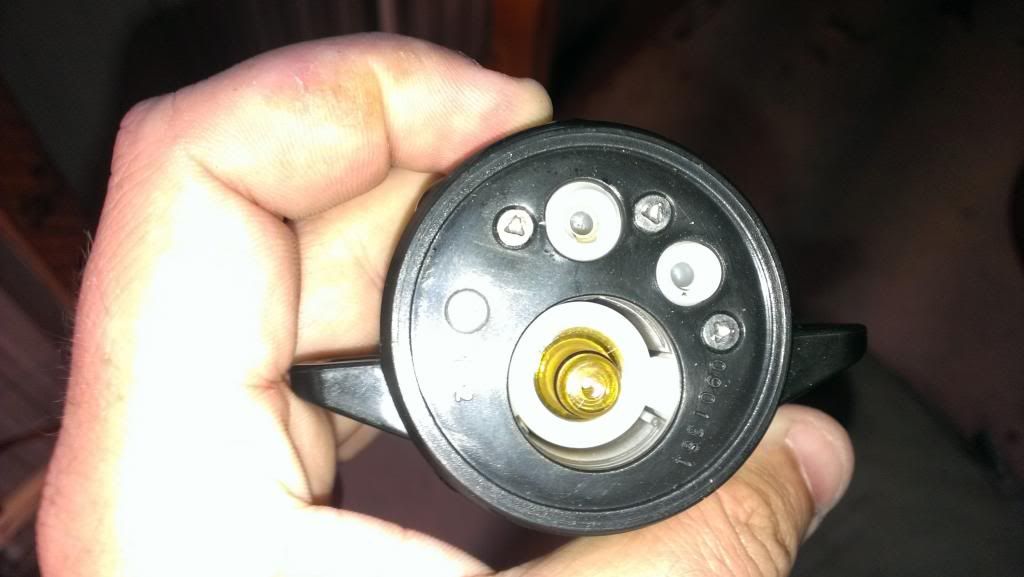
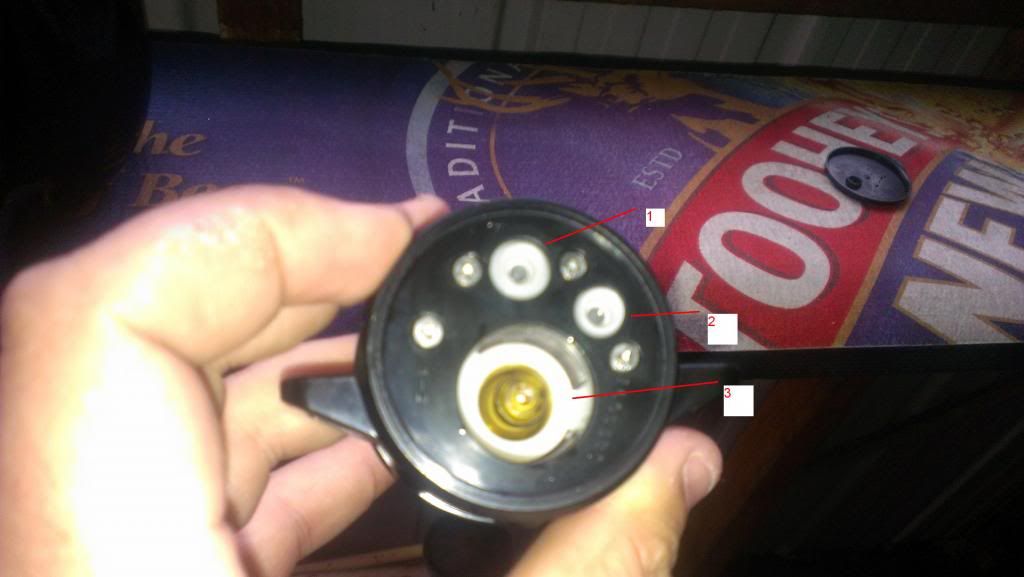
The bottle itself, is designed off a similar principle to a corny keg system. The cap on the bottle contains 3 valves, those being "gas out", "gas in", and "liquid out". These 3 things I will explain in more detail below:
Image
1. Liquid out - This valve is activated when the back of removable tap in the front of the unit is pushed backwards into this valve. This lets the beer through the tap under pressure. There is a plastic hose attached to this valve on the inside of the bottle, which acts as a dip tube

2. Gas In - This is a pressure sensitive one way valve, which lets CO2 into the bottle once it has gone through the regulator. I will explain the regulator further on.

3. Gas Out - This large valve lets the puncturing needle on the back of the regulator pierce the C02 Bulb, and transfers the C02 from the bulb on to the regulator.

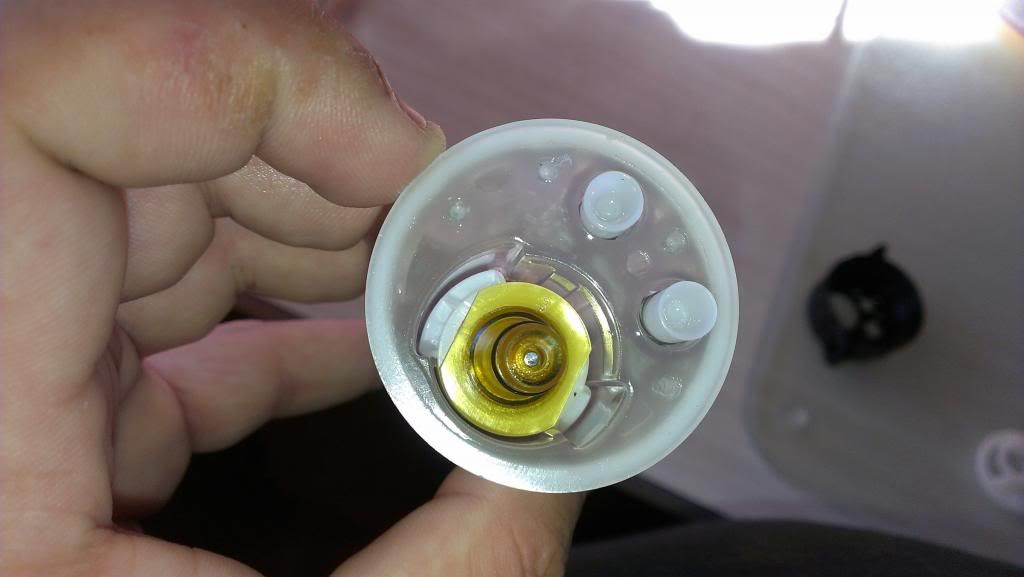
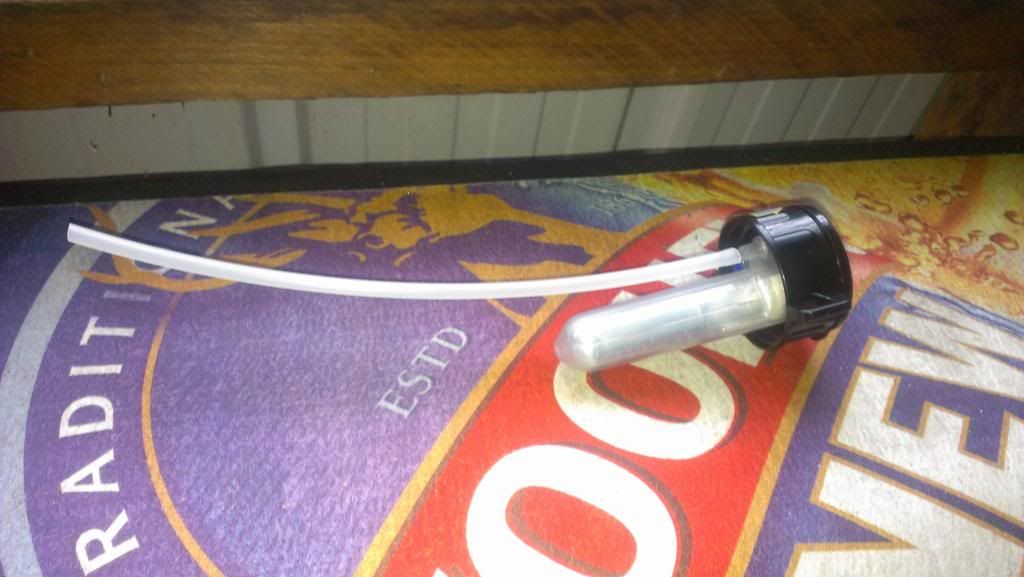
This is the underside of the lid, which houses the dip tube and CO2 Bulb. The chamber which the bulb is housed is completely sealed off from the inside of the bottle:
Image
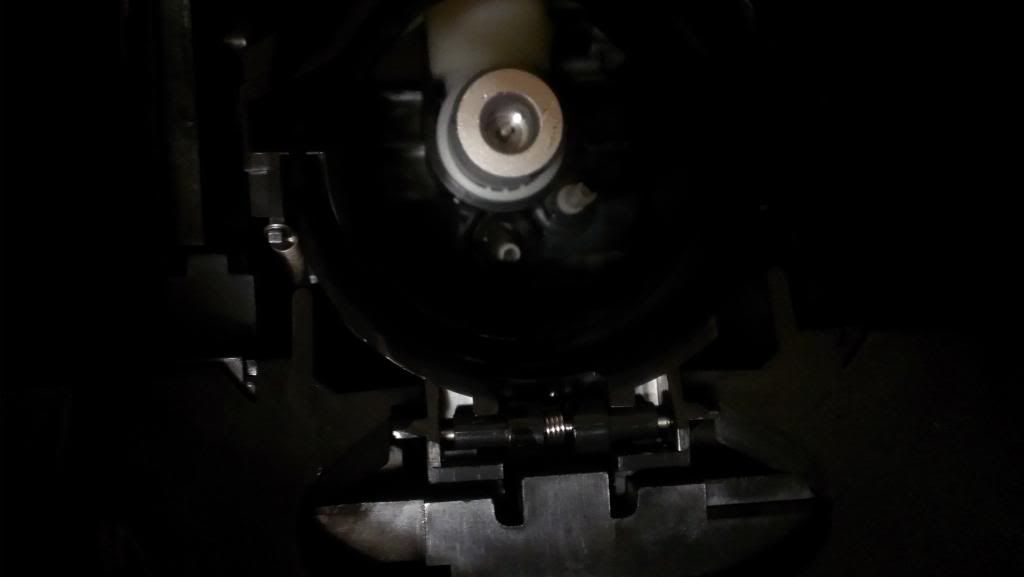
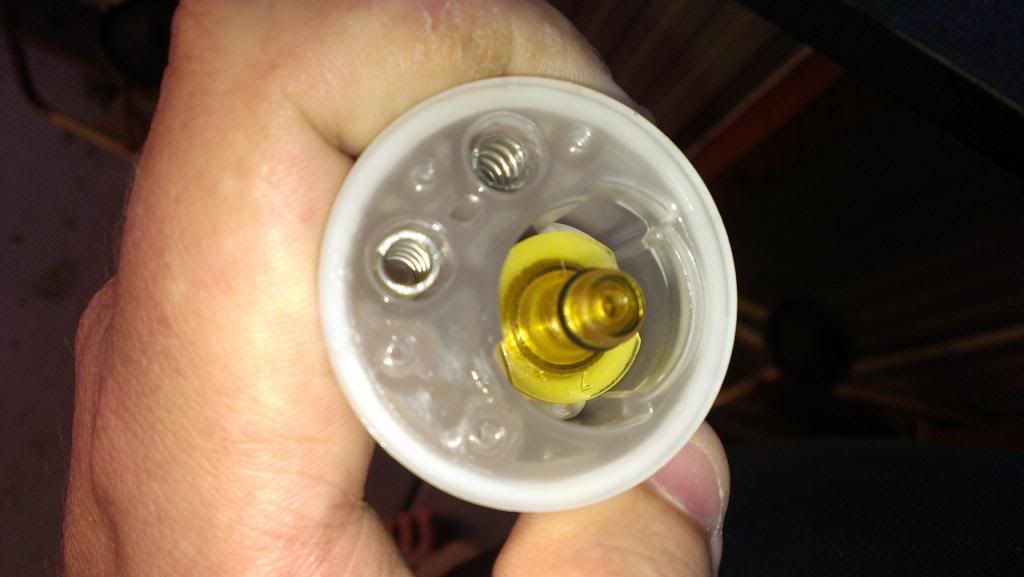
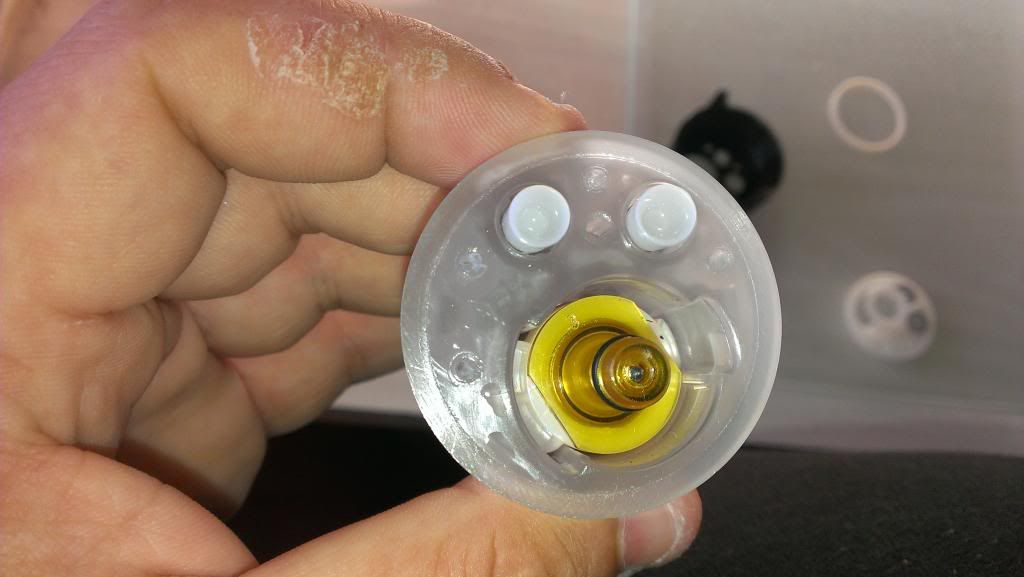
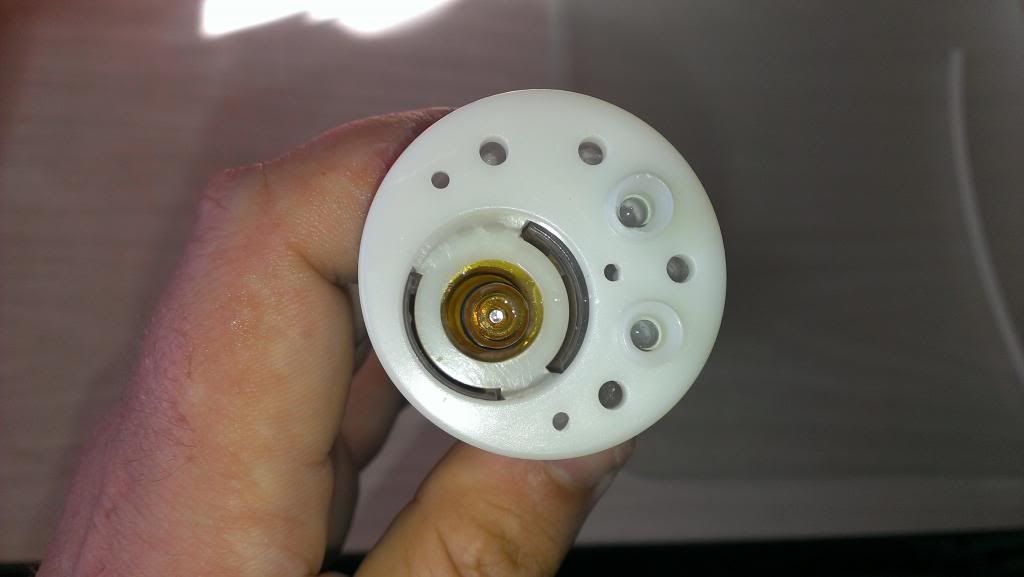
The rear of the TapKing unit houses "pins" which are offset in the same fashion as the cap. These "pins" enter the valves on the lid once the bottle is locked into place. Here is the rear of the unit in greater detail:
Image
The large white plastic bit at the very top is the regulator. This controls the pressure of the gas entering the bottle, and your pouring pressure.

The larger silver bit is the gas in for the regulator and also the puncturing needle for the CO2 Bulb

The small white "pin" directly underneath the silver bit is the liquid out. This is actually the back of the tap, which pushes backwards into the lid and opens the valve when the handle on the front of the tap king unit is pushed inwards.

The small white "pin" which is offset to the right is your gas out from regulator, which connects to the gas in on the bottle and supplies pressure once the pressure inside the bottle drops and allows the one way valve to open. There is a small hose, which connects this pin to the regulator which you cant see in this picture. Some people have had great success using this hose to connect up a sodastream cylinder. For the purpose of this article, I will not go into this just yet as I have not done this modification myself and am yet to confirm it works.

How Can this device be of use to me, as a Home brewer?

The bottles can actually be very easily fully disassembled for cleaning, and to refill/ replace the CO2 Bulb. This is excellent news for us brewers, as it means we can either use this unit to get the benefit of far less bottling and having draught beer on tap in the fridge (particularly if SWMBO does not like the idea of a second fridge chewing power), and also for those who are looking for a much cheaper and simpler alternative to a 9.5 litre corny keg setup for your BBQ's/picnics/camping etc. This I believe would be particularly attractive to those living in an apartment where space for a keg fridge is non-existent. Reusing TapKing bottles will allow these people to get into kegging and be able to store it in the fridge in your kitchen. I've been using this setup for the last couple of months now, and after using it I really don't have a desire anymore to go to a full keg setup now. It cuts my bottling down from 30 long necks to 7 3.2 litre bottles for a standard 23 litre batch. This saves me ALOT of time cleaning and sanitizing that I can spend enjoying my latest brew whilst listening to some music or watching TV instead. Big win here.

So how do we keg our home brew?

Things you'll need:

2mm Triangular Screwdriver (this is required to undo the security bits in the bottle cap. These are readily available on Ebay, this is where I got mine from, I have not been able to find a store that sells them locally). Once the screws are removed you could replace them with ordinary Philips head screws if you wanted.

12g unthreaded C02 Bulbs - These must be the unthreaded type, I got mine (Mosa is the brand) from ezychargers - This site seems to be the cheapest I have found.

A spray bottle filled with a no-rinse sanitizer

Priming sugar or Carb drops

An assortment of O-Rings just in case you get one that looks dodgy (trust me if it looks dodgy fix it or you will end up with a leaking C02 bulb and no pouring pressure)

OK, first thing we need to do is make sure the cap on each of the bottles is spotlessly clean and sanitized.
The only way to do this, is to fully disassemble the cap and clean the internal parts. Here's how we do it:

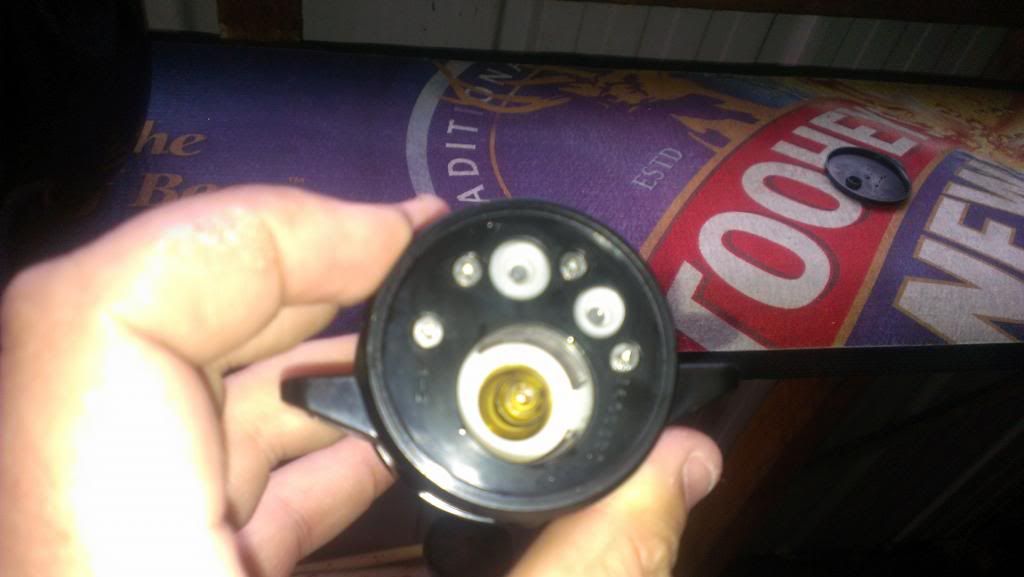
1. Remove the 4 screws holding the lid assembly together
Image
2. Withdraw the black cap, the assembly underneath will look like this:
Image
3. Remove the white plastic plate, this will expose the gas assembly and valves underneath:
Image
4. Remove the gas assembly, 2 white valves, and the 2 springs underneath them.

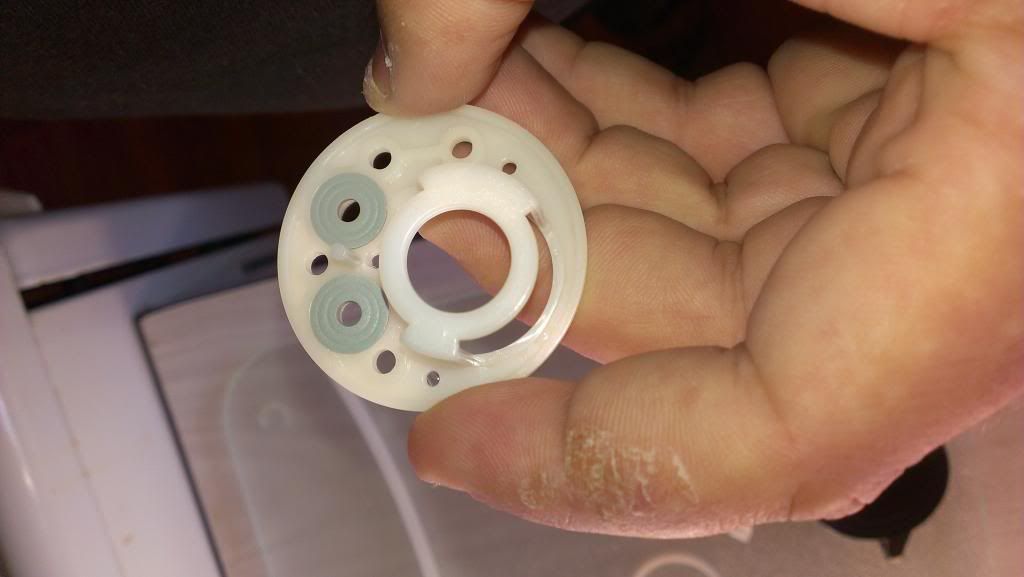
5. Remove the 2 grey rubbery seals from the white top plate. You can see them in this photo:
Image
6. Remove the white O-Ring and dip tube from the bottom of the clear assembly.
Image
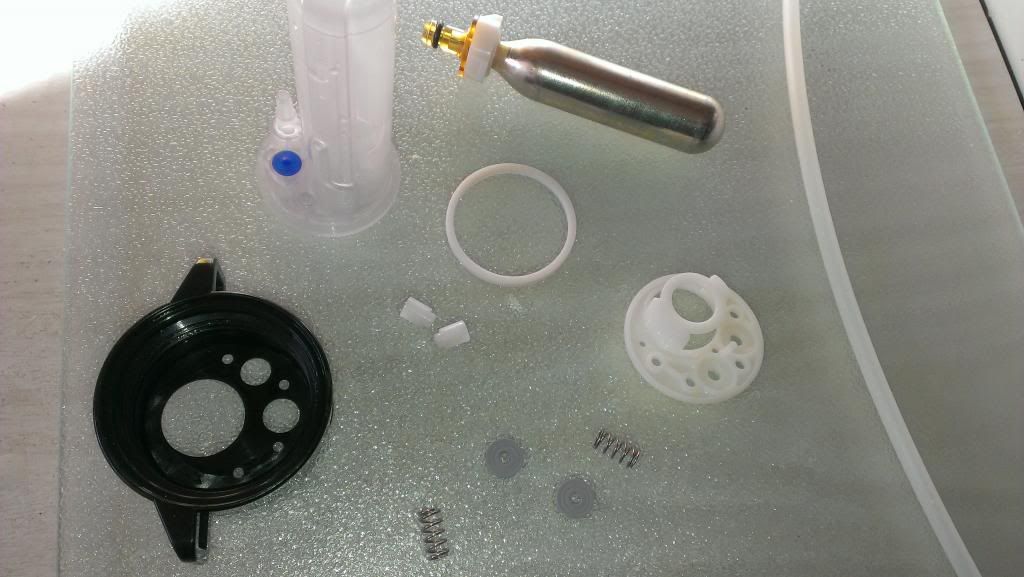
7. Once fully disassembled, you should have a bench full of parts looking like this:
Image
8. Now you need to clean and sanitize everything that will be in contact with the beer. I'm a bit particular with my cleaning/sanitizing regime so I generally clean and sanitize everything bar the gas assembly:

9. While you wait for the parts to dry, its a good opportunity to assemble a new C02 bulb to the TapKing bits. You need to retain the brown cap and striking pin from the spent C02 cartridge. Remove the brown plastic cap from the spent C02 bulb:
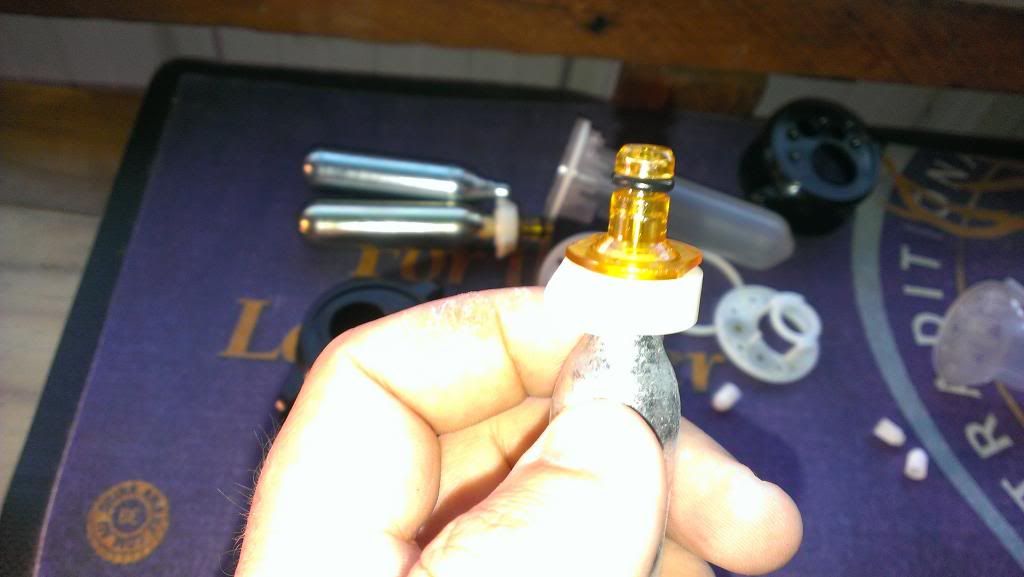
Image
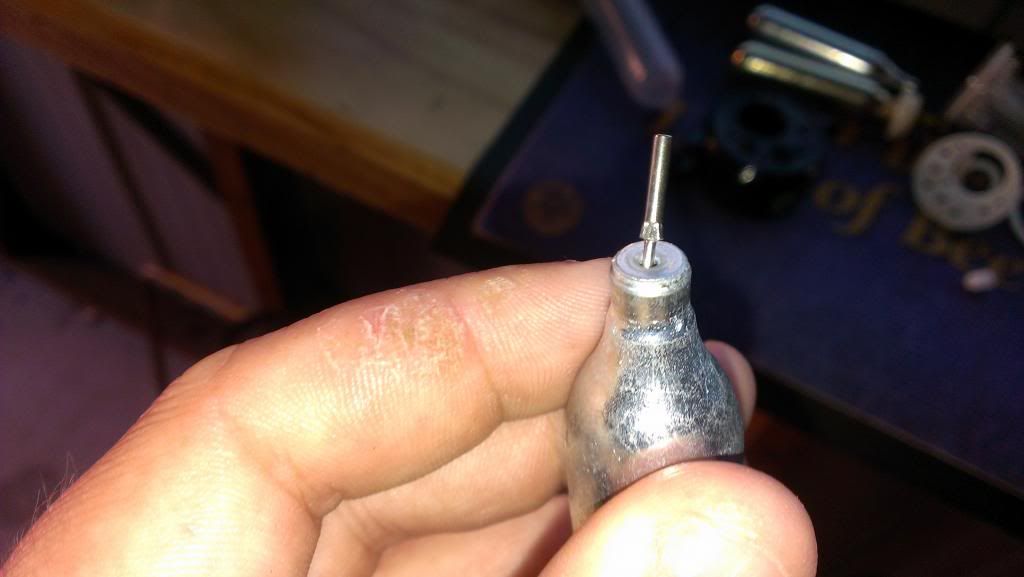
10. Remove the striking pin from the spent gas cartridge:
Image
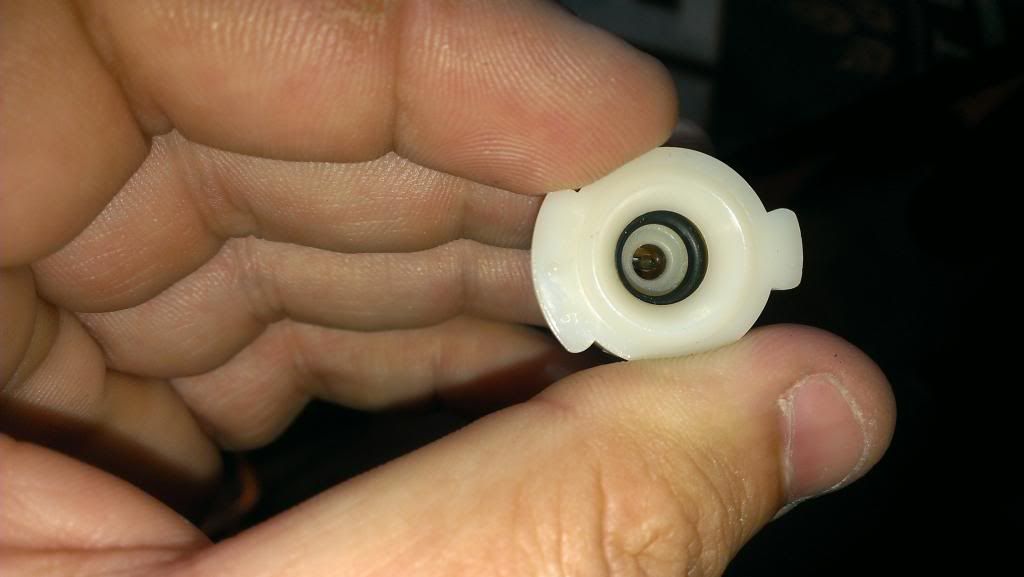
11. Place striking pin back in the small hole in the middle of the brown cap. You need to make sure the sharp pointed end that pierces the bulb is facing towards you:
Image
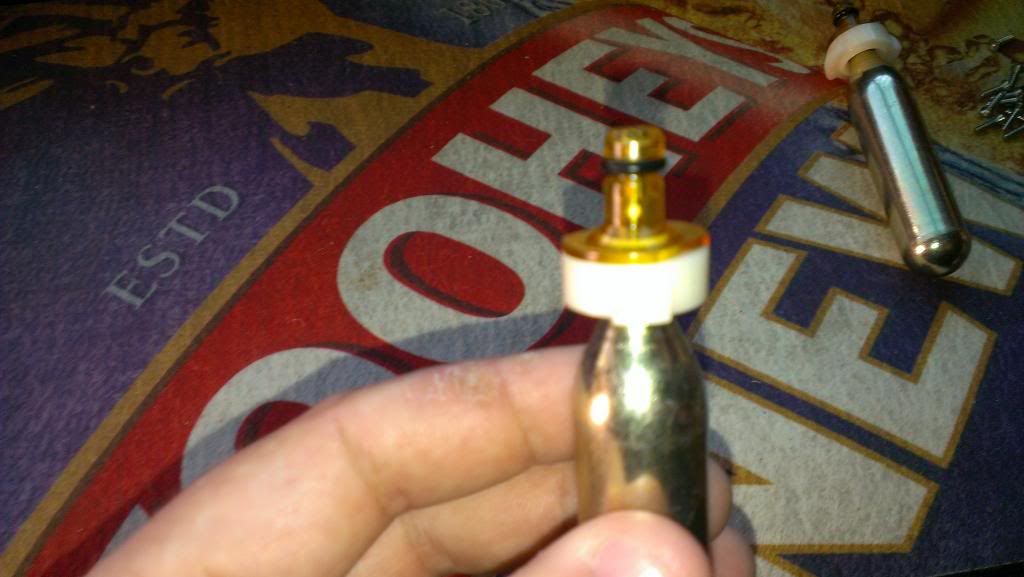
12. Insert a new C02 bulb into the cap and make sure its seated properly with a good seal. Once again, make sure you inspect the O-Ring for damage and replace if necessary. Heres the renewed gas assembly ready to be refitted:
Image
13. Now it's time to reassemble the cap. Make sure you have all these parts gathered ready to go. There should be 1 Clear plastic housing, 1 white top plate, 2 springs, 2 grey seals, 2 white valves, 1 clear dip tube, 1 gas assembly, the black top cap and 1 white o-ring:
Image
14. Fit the Dip Tube and White O-Ring to the base of the clear housing. Make sure the dip tube is orientated so when the bottle is inserted into the unit and is laying down, the tube will be at the lowest point possible in the bottle:
Image
15. Insert the gas assembly back into the large hole in the clear plastic housing:
Image
16. Insert the 2 springs into the 2 small holes in the clear plastic housing:
Image
16. Seat the 2 white plastic valves, with the machined groove sitting on the springs:
Image
17. Insert the grey seals back into the small round grooves in the white top plate:
Image
18. Place white top plate over the top of the clear plastic housing, ensuring that the white valves will seat properly once compressed by the black cap:
Image
19. Replace Black cap, and fix in place with the 4 retaining screws. You will have to apply a little pressure to compress the springs enough to screw the cap down:
Image
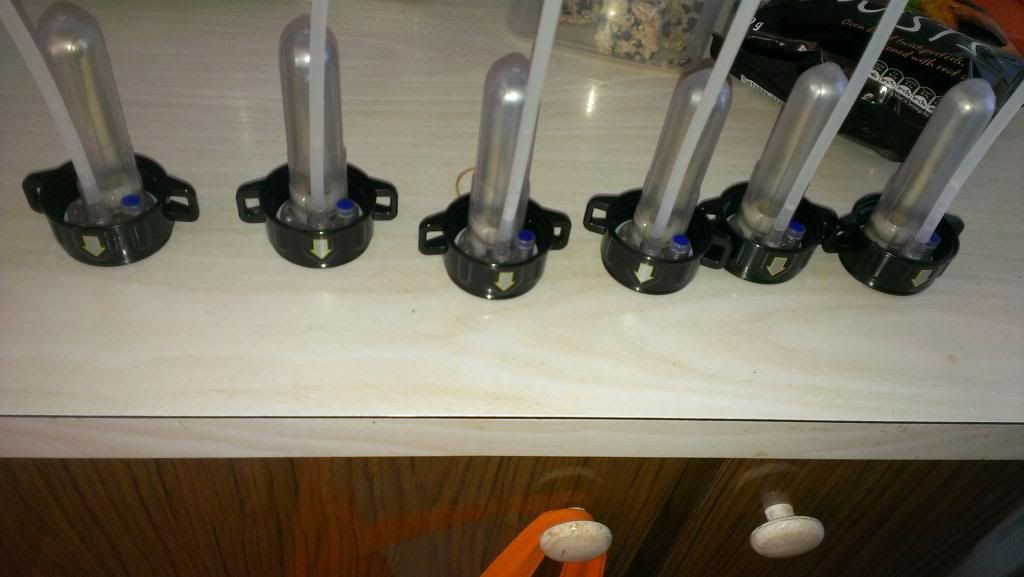
20. Repeat for all bottles, here you can see completed assemblies ready to bottle with your home brew:
Image
21. Bottle as you would a regular batch. Priming sugar or carbonation drops will be needed as there is not enough gas in the bulb to force carb AND dispense. I use carbonation drops, and I find that around 8 is perfect for a pale ale or such. Adjust to suit your own tastes and style of beer you are brewing as normal. It just so happens that a standard bottling valve is JUST long enough to reach the bottom. Make sure you sanitize all surfaces of the cap that will contact the liquid on the inside of the bottle (dip tube and clear plastic) again just to be sure:
Image
22. Leave to condition/carb as normal:
Image
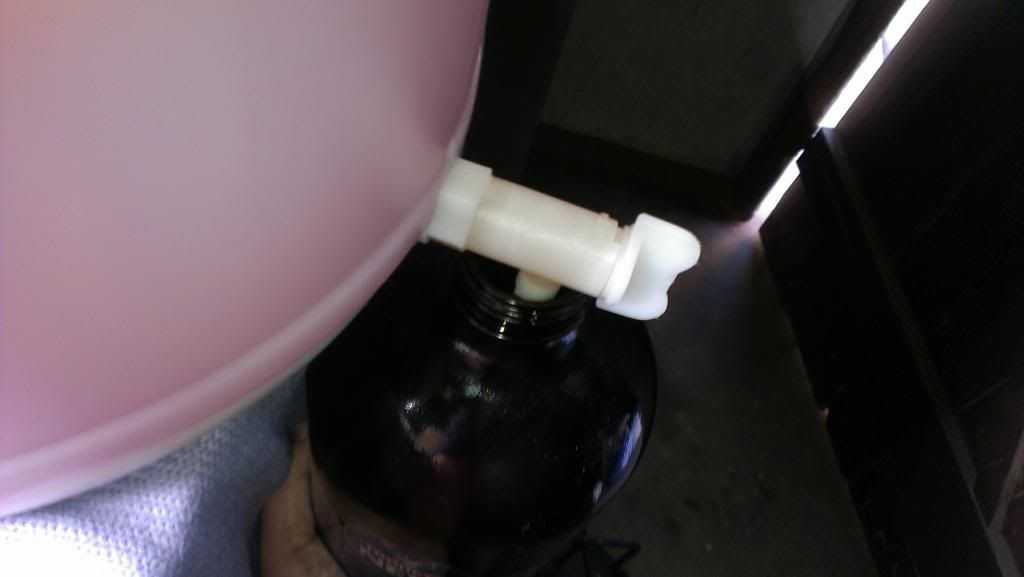
23. Enjoy your cold home brew straight from your fridge:
Image
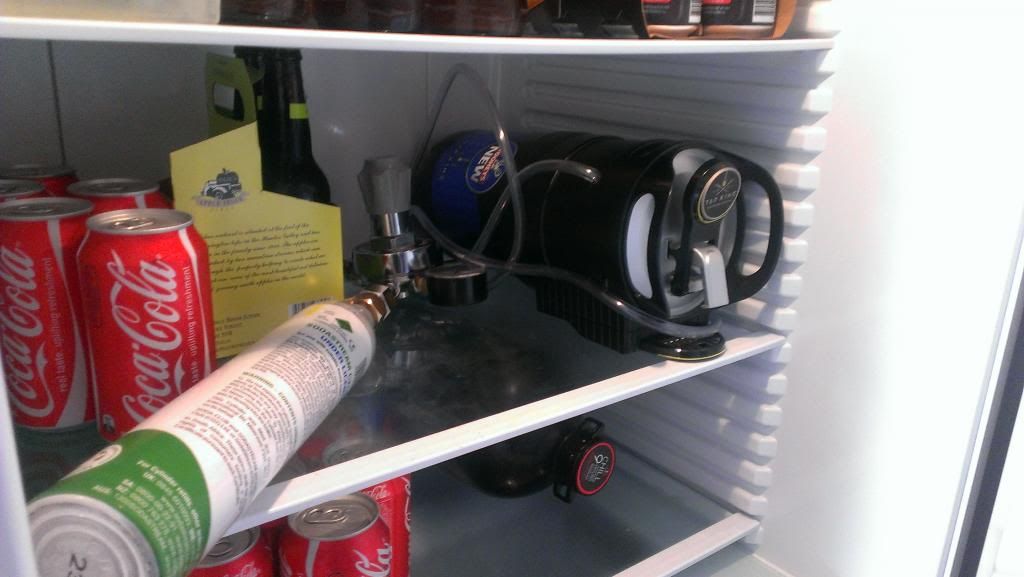
It is also very easy to adapt the unit to use an external C02 bottle. I have done this with my setup, it takes away the hassle of replacing O-rings if you damage one. It just so happens that the plasic hose that runs between the plastic regulator and the gas in post is the right OD to fit inside some 6mm ID gas line. This will have to be covered in a further article at a later date. This is my current setup:
Image
If you have any questions, shoot me a PM and ill answer when I can.
Last edited by pist on 12 Sep 2013, 12:10, edited 12 times in total.

Post #2 made 10 years ago
pist wrote:Many of you may have already read up on this/know about it...
Had no idea what you were talking about pist until I searched for Tap King. Found this but would still like a lot more info.

Don't be afraid to post more information - a lot of stuff that might be obvious to you definitely won't be to me or others :peace:.
Last edited by PistolPatch on 12 Sep 2013, 22:39, edited 2 times in total.
If you have found the above or anything else of value on BIABrewer.info, consider supporting us by getting some BIPs!
    • SVA Brewer With Over 100 Brews From Australia

Post #4 made 10 years ago
PP, I've got another box full of CO2 bulbs on the way and a batch in the fermenter at the moment, I rework the first post into a mini-write up with pics to explain what i'm on about a bit better when it's ready to be bottled. Stay tuned

Post #5 made 10 years ago
Update: I haven't forgotten/abandoned this article. Have been quite busy with work and also other projects at home. I have all the information compiled so I'll post this up over the long weekend when i have a spare hour or so.

Post #6 made 10 years ago
pist, just snuck a look at your edited first post here. You are doing an absolutely fantastic job. Thanks mate :thumbs:.

Please let us know when you are finished but also take your time. I'm really looking forward to reading this. I can tell already that it is going to be one of those really well-written things we rarely come across.

:peace:
Last edited by PistolPatch on 06 Oct 2013, 19:56, edited 2 times in total.
If you have found the above or anything else of value on BIABrewer.info, consider supporting us by getting some BIPs!
    • SVA Brewer With Over 100 Brews From Australia

Post #7 made 10 years ago
:thumbs: Article is now complete for anyone who is interested. This could be useful if you're after a party keg setup on the cheap or have limited space for kegging :peace:

Post #8 made 10 years ago
I 'm on the road this week pist but jcouldnt help posting how amazing that guide is. Must have taken ages! Champion effort :clap: :champ: :thumbs:
If you have found the above or anything else of value on BIABrewer.info, consider supporting us by getting some BIPs!
    • SVA Brewer With Over 100 Brews From Australia

Post #9 made 10 years ago
Hey pist I managed to get a 2nd hand cheap tapking today on gumtree and purchased a twin pack of T.E.D.

I am very keen to drink the swill while my AG APA is fermenting and give the HB tapking a whirl.

I'd be keen to use a soda stream CO2 bottle as I have 1 1/2 in the garage which I can put to good use.

Any chance you could release part 2 of you tutorial or a summary so I know what bits to purchase to run a tapking with external soda stream bottle?

Love the guide and as soon as the first bottle has been consumed I'll use your guide with carbonation drops.

Thanks in advance.

BungBrew

Post #10 made 10 years ago
Sorry guys I haven't been on here in ages due to other personal commitments.
I haven't even had time lately to brew which im not too happy about but that's life...my apologies for not getting back to you!

Well in my absence it seems someone's launched a website dedicated to all things tapking and home brew:
http://www.tapkinghacked.info/

This site has everything you need to know on it. I haven't written the second half of the guide as my time has been focused elsewhere. Hopefully this will get you across the line.

Cheers

Post #11 made 10 years ago
That's great to see this stickied pist and very good of you to maintain it with the post above :salute:.

I wonder if you can buy the bottles empty with a normal lid so as you could just move the main cap from one bottle to the next when it ran out?
If you have found the above or anything else of value on BIABrewer.info, consider supporting us by getting some BIPs!
    • SVA Brewer With Over 100 Brews From Australia

Post #12 made 10 years ago
Np pistolpatch. Its good to be able to give some useful information back...as its because of the ton of info and discussions that members here and especially yourself left behind on other sites that got me into biab. So thank you!

The bottles and lids appear to have been designed specifically for the tap king unit...the lids are a non standard size and ive not seen anywhere online where they sell pet bottles of this size. Would be handy if you could get a blank cap to put over them as this would mean you only have to pull apart one cap not 6 for a 23 litre batch.

Id also expect there to be issues with sanitation going further than a single use. Theres plenty of places within the sealed cap for all sorts of bacteria to become trapped...id beinclined to think youd have similar issues regarding off taste to keg taps and lines that have not been cleaned regularly
Post Reply

Return to “Kegging”

Brewers Online

Brewers browsing this forum: No members and 6 guests

cron