A Guide to Bottling.

Post #1 made 14 years ago
[center]A Guide to Bottling

By Michael Gardner (Beachbum)
[/center]

Most brewers’ introduction to bottling consists of instructions on a kit “Add a teaspoon of sugar to a large sterilised bottle or half a teaspoon to a small one, fill with beer, cap and leave for n weeks till mature”. However there’s a wealth of interesting background issues.

The majority of home brewers start their career with bottling, and many do not go on to kegging. As a kegger myself I nevertheless have a few bottles left over from each keg brew as I brew to 23 Litres and a keg holds 19 litres. And some beers lend themselves to an all-bottle brew, such as brown ales and some sparkling lagers. In this article I’ll cover:

Types of bottle
Filling and Priming
Capping
Conditioning
Cleaning
Last edited by Beachbum on 15 Apr 2010, 09:09, edited 18 times in total.

Post #2 made 14 years ago
[center]Types of Bottle[/center]

In earlier times – up to the 1980s – home brewers invariably used glass beer bottles which were available in unlimited quantities, either by drinking the commercial beer and saving the bottle or by salvaging the bottles from recycling centres or from friends and relations.
These days suitable glass bottles are becoming rarer and many brewers have gone over to PET bottles.

Plastic

Plastic PET bottles have almost completely taken over from glass as Soft Drink bottles and are quite suitable for use with beer provided they are kept in a dark place after filling, because direct light can ‘skunk’ beer. During my first year of brewing I used nothing but 2L bottles (actually, ALDI cola bottles) and had good results.
Image
However the bottle caps can start to fail after a few uses and this prompted me to go over to purpose – made PET bottles which nowadays are made specifically for home brewing. They protect the beer from light and are a little more robust and reliable. Fresh caps can be bought separately, but the existing caps can be reused many times.
Image
Ultimately, however, CO2 will leach through the plastic, causing the beer to go flat, so it is not recommended to store beer for more than six months to a year in them.
A great feature of PET is that you can ‘feel’ the level of carbonation in the bottle by squeezing them, and even if using all-glass, many brewers bottle off a couple of PETs to see how the batch is carbing up.

Glass

Until fairly recently nearly all beer bottles were sealed with a crown seal that needed a bottle opener to remove. These are still the best glass bottles for home brew usage, but in recent decades most bottles in Australia and to an extent overseas have migrated to “twist off” crown seals. The glass bottle top is less robust and, while it can be directly resealed with a new crown seal, it can sometimes chip, and is not really suitable for capping with a double-lever capping tool as shown below. The advantage of glass is that it can store beer for years if necessary and is more aesthetically appealing to many brewers. However, beware – if incorrectly carbonated, glass bottles can be extremely dangerous.
Last edited by Beachbum on 17 Apr 2010, 14:28, edited 18 times in total.

Post #3 made 14 years ago
[center]Filling and Priming[/center]
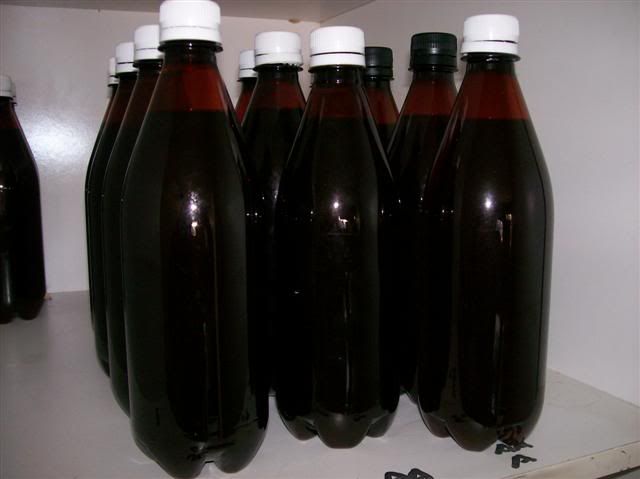
Filling

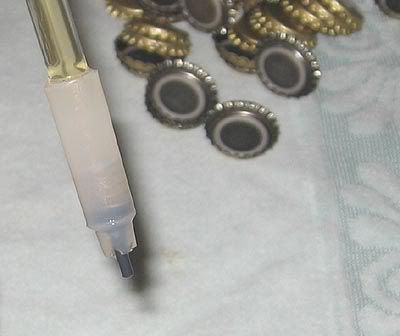
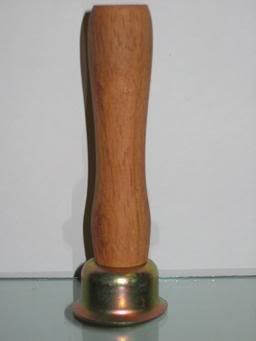
Probably the most useful and sanity-saving piece of kit during your bottling session will be a bottling stick or "cane". It goes right to the bottom of the bottle and when it touches the bottom, a spring loaded valve opens to release the beer for as long as the stick is pressed down. As soon as the stick is lifted off the bottom, the flow stops immediately. Bottling sticks are cheap, although the valves can eventually stick or get misaligned causing leakage. I seem to replace mine every six months or so but it beats having to manipulate a tap or syphon hose for every single bottle.
Image
Priming

The beer in the fermenting or conditioning vessel is only lightly carbonated. To produce the characteristic “fizz” in beer, carbon dioxide ( CO2) needs to be introduced to the bottle. The most common method is to add a small amount of some type of sugar to each bottle, fill and cap the bottle and allow the small amount of remaining yeast in the beer to undergo a further fermentation over a week or more to produce the CO2. The other method, as used in most commercial breweries, is to pre-gas the beer in a keg or holding tank and fill the bottle with clear fizzy beer under “counter pressure” then cap immediately. Counter Pressure Bottle Fillers (CPBFs) are now available to home brewers but will be covered elsewhere on this Forum.

There are two main methods of priming bottles; Single Bottle Priming and Bulk Priming.

1. Single Bottle Priming

Using a small funnel and a teaspoon, the general rule of thumb is to add a rounded teaspoon of sugar to large (750ml or ‘quart’ bottles) and half a teaspoon of sugar to smaller (13 oz, ‘stubbies’ etc) bottles. This is quite vague and is difficult to adjust for different styles which required varying degrees of carbonation.
Some home brew supply companies sell carbonation drops which contain a measured dose of sugars. However they are hard to use with odd sized bottles such as pints or half litres.

2. Bulk Priming

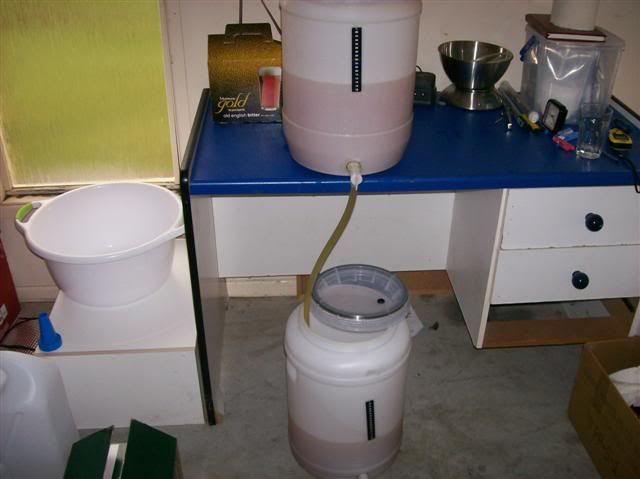
Whilst slightly more work is involved, bulk priming is a method of providing a precise and uniform amount of fizz for each brew. The beer is racked into a separate sterilised container and dosed with a precise amount of sugar (dissolved into a syrup for easy blending).
Image
It is extremely important to mix the sugars evenly with the bulk of the beer or uneven carbonation could result. I find the best method is to put the dissolved sugar syrup into the bottom of the second vessel and as the beer enters via the hose, as in the photo, it swirls around and mixes well, then a dozen stirs with a big sterile spoon(and with minimal splashing of course)should result in a perfect mix. The beer is then bottled out of this second container. This means that a range of bottle sizes can be used with each batch and will all be uniformly carbonated. How much sugar to weigh out and dissolve? Here’s a useful priming calculator which is quite self explanatory and easy to use in both metric and Imperial scales.

http://webspace.webring.com/people/ms/s" onclick="window.open(this.href);return false; ... lator.html

Of course you are not limited to white sugar when priming. Some brewers use dex, others use light dried malt extract and other fermentables. Bulk priming makes it easier to use a variety of priming sugars and the above priming calculator covers a few of them.
Last edited by Beachbum on 17 Apr 2010, 14:33, edited 18 times in total.

Post #4 made 14 years ago
[center]Capping[/center]

PET bottle caps can be re-used several times, especially the dedicated home brew bottles which are a bit more robust than supermarket soft drink bottles. Packs of new caps can be bought from home brew suppliers.

Glass is almost universally capped using cheap and plentiful crown seals and one of the following three types of capping tool:

1. Hammer-On Capper
Image
Cheap and cheerful. Usually the sort that comes with complete home brew outfits. Personally I have never experienced a broken bottle using one of these but the danger is always there. You very soon get over this tool :cry:

2. Double Lever Capper
Image
These work well with genuine crown seal bottles but can crack and chip the more modern twist-off bottles. Again, they are awkward to use.

3. Capper
Image
The most expensive option, but a joy to use. The investment will soon pay for itself. If you want to bottle some vintage brews in Champagne bottles you can get a larger ‘die’ to fit the capper and larger crown seals are also available.
Last edited by Beachbum on 17 Apr 2010, 14:43, edited 18 times in total.

Post #5 made 14 years ago
[center]Conditioning[/center]

Once primed and capped, the beer will carbonate over the next few days and weeks as the residual yeast in the beer ferments the priming sugar, producing carbon dioxide. This gas is of course trapped, so remains in solution to give the characteristic fizz.

Can I add clearing agents such as gelatine at the same time as I prime?
Adding gelatine finings at bottling time will clear the beer spectacularly, but as the sediment falls to the bottom of the bottle it tends to create ‘fluffy bottoms’ where the sediment doesn’t stick well to the bottom and can swirl up easily when the bottle is opened. Best to use gelatine earlier in secondary fermentation, not in the bottles.


My beer is very clear already, will it carb up in time?
If you have left beer in cold conditioning or secondary for a while and the beer is almost crystal clear on bottling, don’t worry. There will be more than enough yeast cells lurking there to carb the beer, it might just take a couple of weeks longer. Here’s one on bottling day itself, it took three weeks to carb fully. An advantage of bottling fairly clear is that the least amount of sediment results in the bottle.
Image
Why is my beer still flat after a week?
One reason that beer takes a long time to carb is that, if you have sugar primed each bottle and the beer is fairly clear on bottling, the sugar can form a dense syrup layer at the bottom of the bottle and the small amount of yeast, as it sinks into this layer, can go dormant and fail to carb. So if using direct priming you may wish to invert the bottles a few times over the first couple of days to disperse any syrup layer.
Another reason for slow carbing is storing the beer too cold. Generally you should store it around the 20 degree mark.


After bottling, should I put my beer in the fridge to mature?
The beer should be stored cool but not cold. It will not carb up in the fridge. Aim for cellar temperature if you can.


My beer has been bottled for six weeks, is it now ready to drink?
Beers do not really need months and months. Some styles such as UK Bitters and American Ales are just fine after a week to ten days. Brewers of kit beers are recommended store the beer for a month or more because this style of beer is not too nice when it is ‘green’. Nearly everyone reading this will be an All Grain or partial Brewer so there’s no point in emulating the way that kit brewers do things.

What do I do with my potential bottle bombs? They are way too fizzy.
One advantage of PET, if you have accidentally overcarbonated a brew (usually because the batch had not actually fermented out thoroughly) – you can go through the brew a bottle at a time and release excess gas and reseal. You may have to do that a few times but it avoids losing a batch. It is also possible, although labour intensive, to do this with glass bottles. Best to chill it down first as this will help avoid a gusher on opening.
Last edited by Beachbum on 17 Apr 2010, 14:45, edited 18 times in total.

Post #6 made 14 years ago
[center]Cleaning[/center]

The most important thing you can do is to thoroughly rinse and shake each bottle a few times as soon as possible after drinking. This is 99% of the battle.

Then all that is usually necessary is to rinse each bottle with a “no rinse” sanitiser such as Starsan and store in a dust free place till its next use. No rinse means that the sanitiser can be left in the bottle without further rinsing with fresh water, because it is flavourless and odourless.

Some people use a solution of household bleach or bleach and vinegar. Cholorine based bleach is ‘sticky’ and take three or four rinses to get rid of the "swimming pool" smell out of the bottles.
If you end up with yeast rings or mysterious spots, then treatment with a solution of Sodium Percarbonate will digest just about anything. This can be bought pure from cleaning suppliers or is found in Diaper / Nappy cleaners and other oxygen bleaches. Leave for a few hours then rinse well.

Some brewers use bottle trees where the bottles can sit inverted for a few hours to drain thoroughly. If you attend to your bottle cleaning as soon as possible after each drink you should very rarely or never suffer from an infected bottle. Most problems arise from bottles that have been left lying around dirty. Remember - if the beer you just drank was good then the bottle doesn't harbour nasties. They generally only arise when a used bottle has been neglected, you might as well have left out a Petri dish for the bugs :D

Happy bottling, happy drinking :twisted:
Michael
Last edited by Beachbum on 17 Apr 2010, 14:46, edited 18 times in total.

Post #7 made 11 years ago
I bulk prime & have never had an issue with over or under carbonated beers doing it as described by BeachBum. I use dextrose & use the calculator as above. I also use this method for dissolving dextrose for adding to my bottling bucket. 1.5ml water for each gram of sugar.

EG. Using the calculator, if you desire 2.4vol/CO2, Beer temp 20degC, 20 litres of beer to carbonate, you will need 124g of dextrose. 1.5ml for each gram of sugar = 186mls of water for dissolving your dextrose. Add 186mls of water to a heat proof measuring jug, place in microwave to heat up, add dextrose & dissolve completely. Return to microwave until mixture boils. Remove from the microwave & place some foil over the top of the jug & let it cool & add to your bottling bucket. Siphon beer to bottling bucket as described by Beacbum ensuring a nice swirling mixing action.

There is quite some debate as to what figure to add to the beer temp column. I have been advised that this figure should be the maximum temperature that your fermenter reached post fermentation. So if you are fermenting at ambient temperatures & your fermenter was exposed to fluctuating temperatures, you record the highest temp your fermenter was exposed to & input that figure for your beer temp into the calculator. It is much simpler if you have a fermentation fridge & if you ferment at 18degC, then simply input 18 into the beer temp column. I have some reservations of this method & am not 100% certain that this is correct. As we know, higher beer temps release CO2 & colder temps absorb CO2 into solution so if on bottling day your beer is at 15degC, I use that as my beer temp input. If you are bottling at 24degC, use that as your beer temp input. Temperatures will affect how much residual CO2 we have in solution & I have been using the ambient temp of my beer on bottling day regardless of what my fermenter was exposed to. This is working for me with my expected Vol/CO2.

Post #8 made 8 years ago
Im pretty lazy. I always use PETs and carbonation drops. I dont stray from that standard carbonation level. Allthough I usualy only make American/Australian type Pale ales. Every programme I have tried does not have the drop option. Are all drops the same? Can PETs take 2 drops to make a more carbonated beer? Can I just cut them in half to reduce/increase the carbonation? And should I switch to bulk priming?

Sorry for so many questions... so little time and all.

Post #9 made 8 years ago
I have never used carb drops personally, but you want to be careful not to overcarb. At least using PET you won't get glass grenades.

I would think your questions would really depend on the size of the bottle, and the recommended volume for the carb drops. If you really want to dial in your carbonation levels, there are priming calculators that can help you use the correct amount of sugar for the volume you are carbing, at the temp you are carbing.

I personally prefer to batch prime with dextrose or sucrose, I boil whatever sugar I am using in a small amount of water, cool it, and then add to my bottling bucket before racking the beer on top. The only problem here is that the different calculators available out on the internet can have variations, so it can take a little trial and error to get used to one. The Biabacus actually has a built in priming calculator in section Q which works quite well, and there is also work being done here to try and get even more accurate calculations...
Last edited by goulaigan on 28 Apr 2016, 21:30, edited 18 times in total.
    • SVA Brewer With Over 100 Brews From Canada
Post Reply

Return to “Bottling”

Brewers Online

Brewers browsing this forum: No members and 13 guests

cron