[center]A Basic Guide to BIAB using an Urn
By Michael Gardner (Beachbum)[/center]
[center]
Introduction
For a comprehensive guide to BIAB, see the Master Guide on this forum. This article is in two sections, a general discussion followed by a 'how to'.
- There is a more detailed introduction to BIAB in the main Guide on this forum. However as a refresher:
The entire water (liquor) required for the brew is heated to strike temperature which is around 2 to 3 degrees hotter than the desired mash temperature.
The power is turned off.
A bag large enough to completely fill the urn is fitted and secured around the top of the urn.
The grain bill is quickly and thoroughly stirred in and the urn covered.
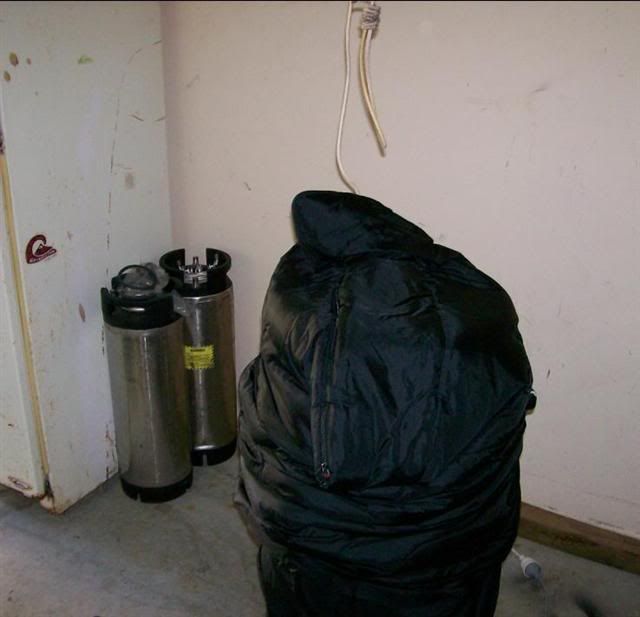
The urn is lagged using sleeping bags or a quilt or camping mat and left for the desired mash period (some brewers prefer to add heat during the mash, this will be covered later).
The lagging is removed, the bag is hoisted and drained.
The power is turned back on and the wort brought to the boil.
A hop sock is suspended in the wort and hop additions are made.
Kettle finings may be added towards the end of the boil.
The hop sock is removed, the urn is covered and allowed to boil just long enough to sterilise the headspace without getting a boilover, and the power is switched off.
The wort / break is allowed to settle and the wort is run off to be cooled to a suitable temperature for pitching the yeast.
General Discussion
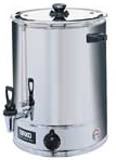
40 Litre electric hot water urns (bulk hot water boilers) of the type that you often see in restaurants, clubhouses and community halls are becoming increasingly popular with home brewers. They lend themselves to Brew in a Bag (BIAB) because they offer an integrated one-vessel solution.
Urns come with their own heating element and tap, thus doing away with the need to buy gas bottles and burners or the need to drill or modify a large stockpot or a commercial metal beer keg. Add a brewing bag, and the 40L urn provides a 'turn-key' brewery ready to go out of the box. 30 Litre urns are also ‘do-able’ and some brewers find them quite adequate for producing batches tailored for Cornelius 19 Litre kegs.
Disadvantages of an urn.
Brews are limited to single-size 'standard' 23 to 25 litre batches in the case of a 40 Litre Urn. Not having done a poll on this, I nevertheless get the impression that brewers doing large double or even triple batches are in the minority and urns would not suit their style of brewing. On the other hand the ease of use of an urn for BIAB brewing make it quite feasible to do a side by side brew using two urns, or even do two end-to-end brews on one day with not much more effort than a large three vessel brew with its attendant clean up and sanitising chores.
Any disadvantages of doing BIAB in a 30 or 40 Litre pot in general also apply to urns, for example a 25 Litre brew of extremely strong beer such as a Russian Imperial Stout would not be a serious candidate for this style of brewing. However most brewers who prefer their beer between 3.5 % and 6% ABV should have few efficiency problems.
Urns, reportedly, take longer to heat to strike temperature than gas and longer to raise the wort to a rolling boil compared to gas. Having said that, many 3 vessel brewers actually use an urn as a Hot Liquor Tun. Some brewers use a time switch to turn on a pre-filled urn so the strike liquor is ready at a prearranged time.
Getting an Urn
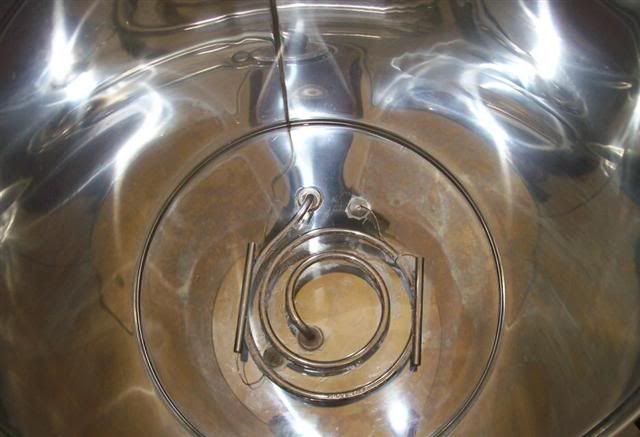
There are two main brands of urn available in Australia, Birko and Crown. Birko urns have an exposed element, Crown Urns have a concealed element in the base. There has been some criticism that Crown urns have a thermostat cut off which makes the boil sluggish. This can be worked around but I don't offer any advice on this, not being a qualified electrician. Birko urns give a good rolling boil.
In the UK, the similarly named Burco company produce a range of urns up to 30 Litres and the Buffalo 40 Litre brand is available, described as a “Manual Fill Hot Water Boiler”
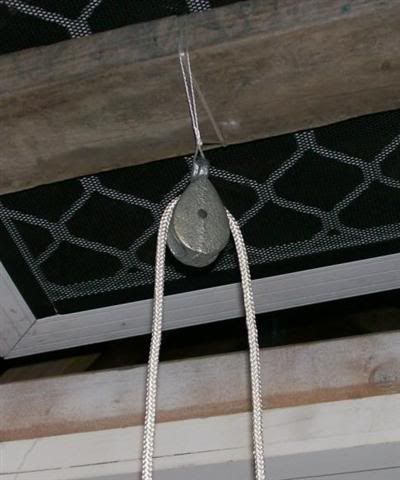
Hoisting the Bag
A ‘skyhook’ is welcome, if an overhead beam is available. I just use a single pulley which is a cheap awning pulley with a fairly thick cord to avoid it slipping off the wheel and jamming. Some enterprising brewers use the top lintel of a door frame with an “eye bolt”, and some have even made “gallows style” BIAB rigs.
Urns with an exposed element can be scrubbed clean using a green kitchen scourer. Surprisingly sugars and other compounds don't get 'burned on' to it and after a few brews it may take on a chalky appearance but that scrubs off easily. An urn descaler/cleaner is available from Catering suppliers but I haven't used it yet, it's more for urns that have been used in catering and left on for days on end with town water in them I guess. It is very important to take the tap apart when cleaning as break material and hop debris can lodge in it and may cause infections in subsequent brews. Many owners easily replace the “native” tap with a ball lock tap.
Familiarity can breed contempt and always be aware that you are dealing with electric equipment containing nearly 40L of boiling liquid that could easily put you in hospital or kill pets and small children so the same safety precautions should be taken as with all brewing operations.
Step by step how-to
Of course this section contains a lot of information that is common to all brewing, and a lot that is common to all BIAB brewing. I'm just presenting how I do things on my equipment using a Birko Urn.
Thread your cord through the “skyhook pulley” if you have one. Nothing worse than forgetting and having to clamber over a full hot urn later on.
Prepare the strike liquor
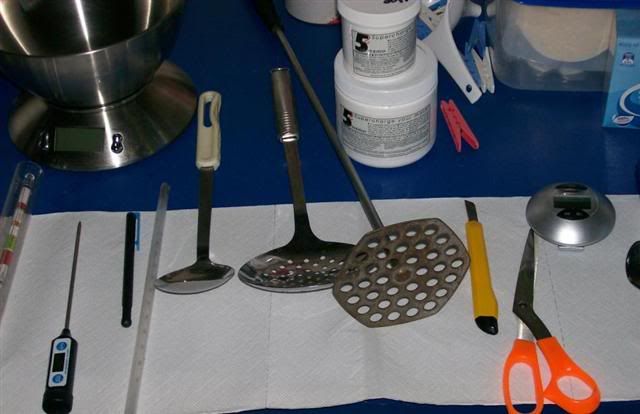
It is essential that you have a good thermometer, an electronic probe kitchen style thermometer is ideal for mashing. I don't fiddle with the temperature knob on the urn, I just leave the Birko on 95 full time. I'm fortunate to have solar hot water and carry 5 litre plastic containers to fill my 40 Litre urn to about 33 litres. This leaves plenty of leeway for grain bills up to 5.5k.
While the urn is heating I add any water salts and weigh out the grain bill. I don't personally mill but this would be the ideal time to mill your grain. As a rule of thumb I allow three degrees hotter strike water. So if I'm aiming for a mash at 66 I will heat the strike liquor to 69 but allow it to just "come off" after that for a few minutes. Give the liquor a good stir so you aren't measuring the temperature of a convection plume.
Fit the bag
Switch off the power, lower the bag and clip it round the edges of the urn with clothes pegs. Some commercially available bags are elasticated.
Dough in
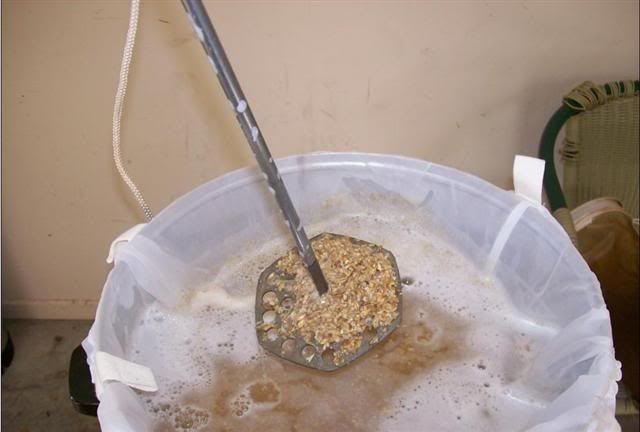
Add the grain bill in a thin stream and stir constantly with a large spoon to avoid doughballs. Then give the mash a good up and down rousing with a metal paint stirrer available from hardware stores or a good stir with whatever other mash paddle you have on hand.
If the bag has a drawstring, you might want to pull it tight to avoid loose grain floating out of the bag during the mash. Now put the lid on the urn and slip an old kids sized sleeping bag over the urn like a giant condom. Be careful of the urn tap which you can flick on accidentally. Then wrap the whole thing in a quilt and strap it with some cord.
Another method favoured by many brewers is to use a purpose made insulating ‘jacket’ made out of a camping mat or other foam sheet material. You should get about one degree per hour drop in temperature, which is more than acceptable as most saccharification will take place in the first half hour.
Reduced 67%
Some BIABers do a half - time application of heat, particularly in colder climates where even passive lagging could cause an unacceptable drop in temperature. With an urn that has a concealed element this should not be a problem, but in the case of an exposed element you could raise the bag clear of the element and apply a short burst. In both cases you would need to open the urn and do a big stir up to distribute the heat. This may also improve your efficiency. This is also a viable way of doing stepped mashes, such a protein rest.
I normally do 90 minute mashes, and have a cheap timer set to 90 mins.
Hoist the bag
Before hoisting, I usually give the mash another good pumping with the paint stirrer to loosen it up and flush out any goodies that may be hiding in the grain husks. If you can get an assistant to grasp the bag in two hands, lift it clear of the wort and keep it there while you tie off the pulley rope, you've won.
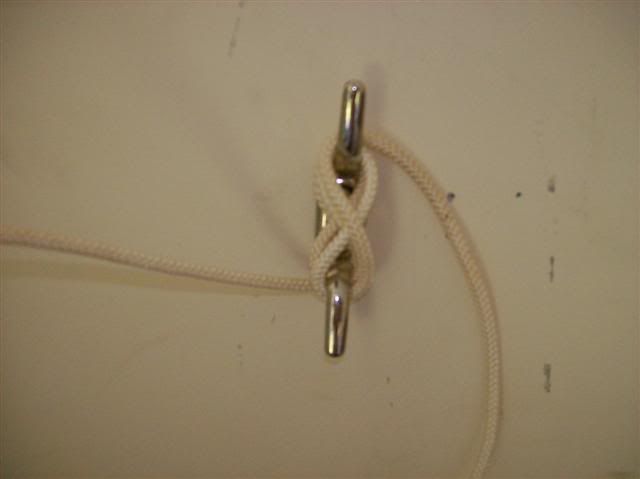
Otherwise you will need to hold and squeeze until the bag is light enough to put it in a large food grade bucket or small baby bath and hang it off a door knob, tripod, whatever you can find. For tying off the rope, a wall mounted cleat is a cheap and brilliant one-hand solution.
Now we are going for a rolling boil,
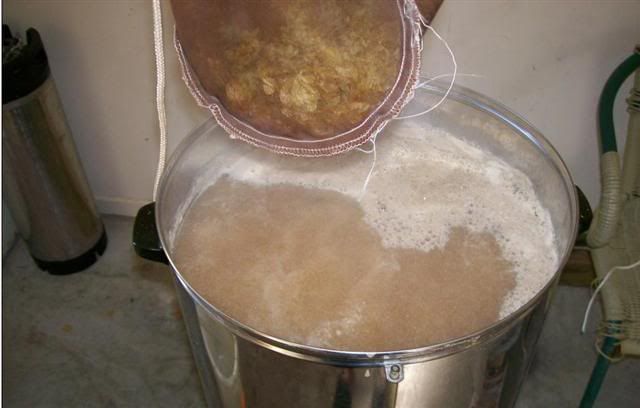
Note the hopsock ready to lower and also note that this level of wort in a typical 40 L boiled for 90 minutes on a roll should reduce to enough wort to yield 23 litres for the ‘standard’ home brew batch.
At the end of the boil
Don't forget the kettle finings, for example Whirlfloc. When finished, remove hopsock and put the lid on the urn then move yourself quickly to the electric wall socket and keep an eye on the urn. You will see some plumes of steam shooting out of the nostrils on the lid. Then switch off before the wort rises and foams out from under the lid. This should have nicely sanitised the headspace so you can safely leave it for about twenty minutes by which time the break / trub should have settled right out.
BIAB's work is done. From this point on, the cooling and fermenting of the wort is the same as any other brewing technique.
Equipment check list.
Urn
Extension Cord
Bag
Mash Paddle and spoons
Accurate 'stick' thermometer
Scales accurate to 1g
If using a skyhook: Awning rope, pulley
If passive lagging: Sleeping bag, quilt
Large food grade bucket
Stockpot
This should get you brewing grain beers and set yourself free for an expenditure that will give you a robust brewery that is in no way a compromise or ‘stepping stone’ to some other method such as three-vessel. On this point of purchasing equipment, you will have many of these items already if you doing kits, partials or extract brewing.
Happy Brewing :twisted:
Beachbum

